Follow my step-by-step guide to learn how to start a blog in 2024 and make money online.

In 2017, after five years of working in various corporate jobs, I knew that I had to make a change in my life.
I wanted to do something with more creative freedom and the flexibility to work when I wanted.
Since then, I have learned about setting up and running both physical and digital product businesses.
I have sold handcrafted items on Amazon and digital downloads on Etsy. But if I had to pick a turning point for my online business, it would be starting a blog.
Blogging will be one of the most exciting, challenging, and rewarding journeys you will take up.
When I started, I wasn't even sure about the technical aspects of setting up a blog and how to get visitors by promoting content.
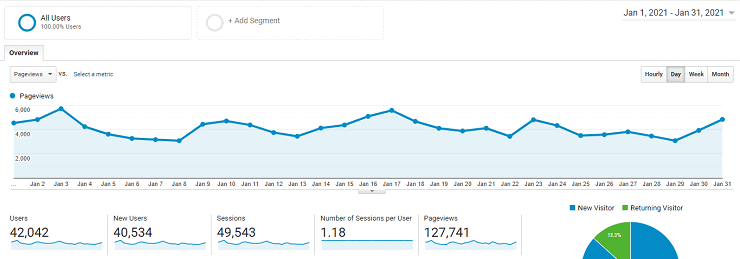
In January 2020, this very blog you are reading had zero visitors.
One year later, in January 2021, this blog had more than 42,000 amazing readers and 127,000 page views.
There were a lot of challenges and learnings along the way.
And today, I am happy that I make money through promoting my digital products and affiliate marketing.
What makes me immensely grateful is that I get to share content I love making from the comfort of my workspace at home.
If you have been holding back on starting your blog, here are my top three reasons why you should start a blog in 2021 –
- Make passive or full-time income online – You can make hundreds to thousands of dollars per month through blogging by working on your laptop from anywhere you want.
- Grow your business – Blogging is one of the best ways to promote your products or services.
- Creative freedom – You can share your knowledge and express your creativity through a blog while earning money.
You should set up your blog to succeed from day one, so every choice you make for your blog is essential.
Grab a cuppa and settle in because this blog post will take you through every detail to keep in mind while setting up your blog.
This blog post is all about how to start a blog and make money.
How to start a blog and make money in 8 detailed steps
- Choose your blog niche
- Pick your domain name and web hosting
- Setting up your WordPress blog
- Picking your blog theme and layout
- Best WordPress plugins for your blog
- Writing blog posts that bring traffic
- Promoting your blog posts
- Making money from your blog
1. Choose your blog niche
The first step in starting a blog is selecting your blog niche. A topic that you are interested in and has the potential to make money.
Ask yourself these three questions before deciding on your blog niche –
- Am I passionate about a topic? Write down a list of topics that you are knowledgeable about. These could be skills you acquired or hobbies you love spending time on. Look at what content you most enjoy following on Pinterest or Instagram.
- Is there a market for my niche? Look at blogs and websites that already have content in the niche you are interested in. What questions are they answering? Which blog posts are popular? Is there a gap in the market you can address with your blog?
- Can I make money? Search for products in your niche that you can sell or promote through affiliate marketing.
Here are a few blog niche ideas to give you an idea –
- Homeschooling
- Vegan Recipes
- Budget Travel
- Financial Planning
- DIY Craft Projects
Instead of writing about a broad topic like food, you should pick a niche, like vegan recipes, budget meals, or meal-prep ideas.
2. Pick your domain name and web hosting
Once you decide on a blog niche, choosing a memorable domain name and the best hosting for your blog is the next step.
Choosing the right domain name is very important. Having a good domain name helps your blog stand out from the competition in your niche. It allows readers to remember your blog name easily.
Here are my tips on picking a domain name –
- Short and memorable – Short and sweet domain names are easy to remember. The general guideline is to aim for 15 characters or less in your domain name.
- Use .com extension – It is the most common and well-known extension for domain names, and it is easy to remember.
- Easy to spell – Your domain name should be easy to spell.
- Use only Alpha Numerals – Avoid using hyphens and punctuation in your domain name. Use only alphabets and numbers.
For example, look at my blog name, thedesignhippo.com. It is short, less than 15 characters, easy to remember and spell, and does not have any hyphens or punctuations.
Now that you have decided on the name of your domain let's look into the best hosting plan to launch your blog.
I recommend Bluehost. It is affordable and the best hosting service provider for blogs and eCommerce.
My top reasons for recommending Bluehost –
- Free Domain Name – With any 12 months or above plan, you will get a free domain name for a year.
- Budget-friendly – All plans are affordable. You can get hosting plans for as low as $2.95/month if you sign up for the 36 months plan.
- Free SSL Certificate – You will get a free SSL certificate with any of the Bluehost plans. SSL certificate is a must for Google to index your blog.
- WordPress recommended – WordPress.org is the gold standard when it comes to blogging and recommends Bluehost.
Setting up hosting with Bluehost
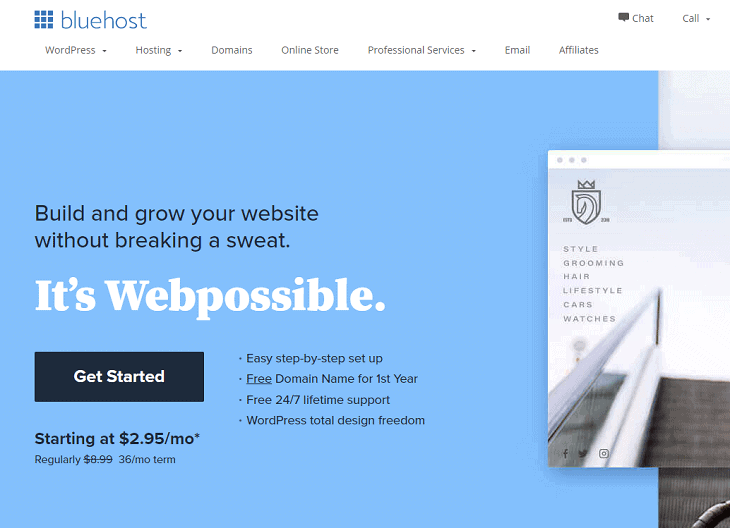
1) Select your plan – Head over to the Bluehost website. You will see a landing page like the one below. Click on the “Get Started” button.
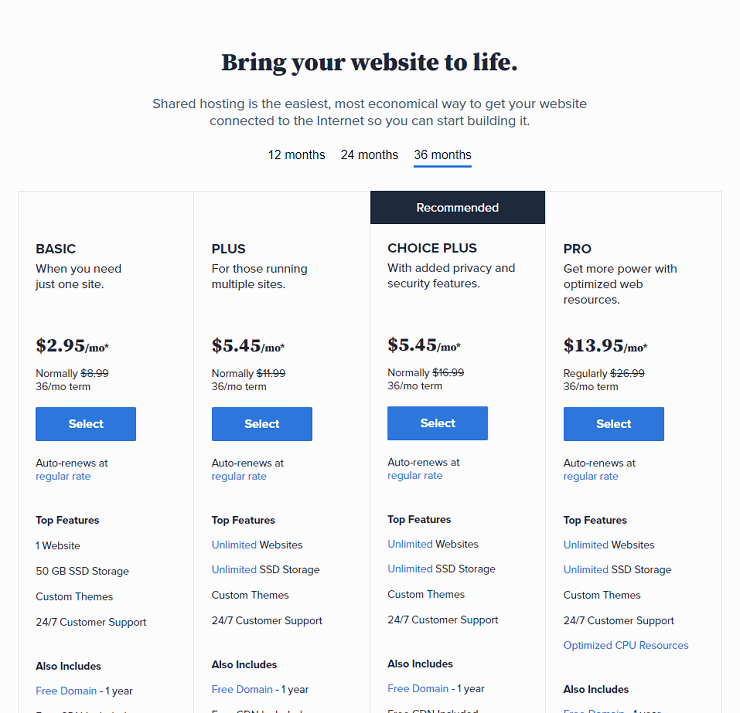
A page with four plans will open. Since you are just starting, you can select the “BASIC” plan. Click on the “Select” button after choosing your plan.
2) Choose your domain name – A new page asking for a domain name will open. Input your chosen domain name here and click on the “Next” button.
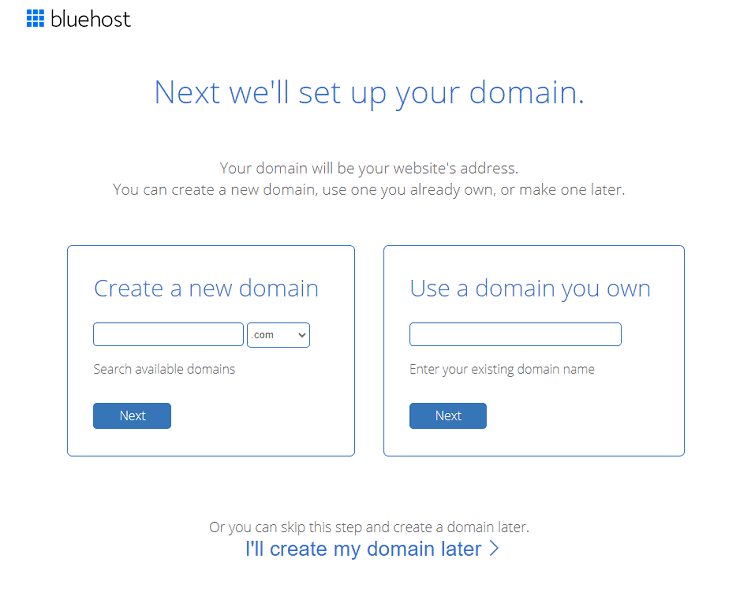
If you haven't decided on your domain name yet, you can skip this step by clicking on “I'll create my domain later” at the bottom of the page.
3) Create your account – It's time to fill in your details, such as name, email address, etc., under Account Information.
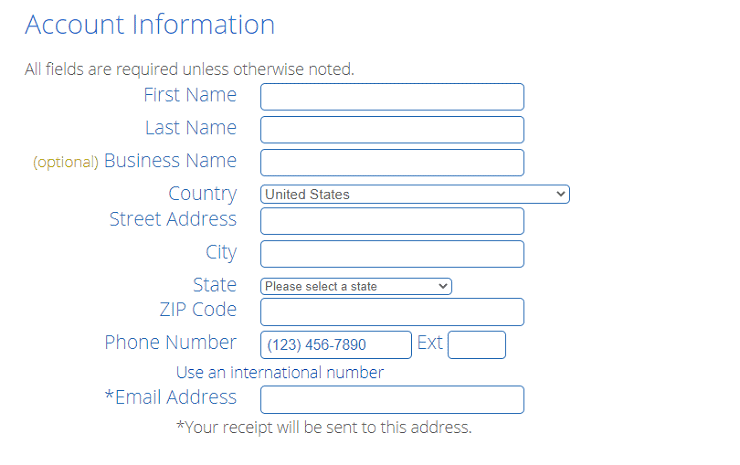
To get the best deal on pricing, I recommend opting for the 36 months plan. With more than a 65% discount, it's a great bargain.
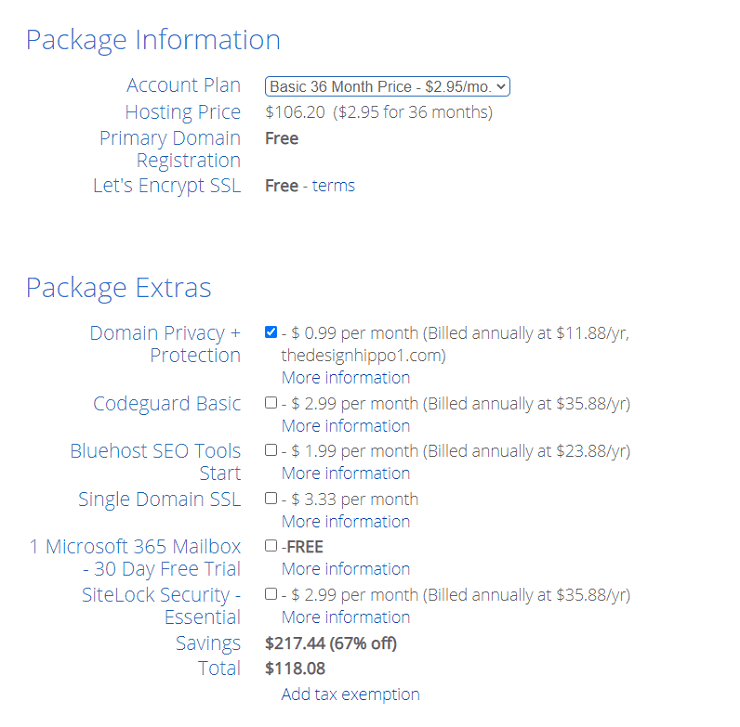
Under Package Extras, uncheck everything except the “Domain Privacy + Protection” box. It will cost only $0.99/month. Without domain privacy, your personal information is visible to the public on the whois database. Marketers and spammers use this information to spam you.
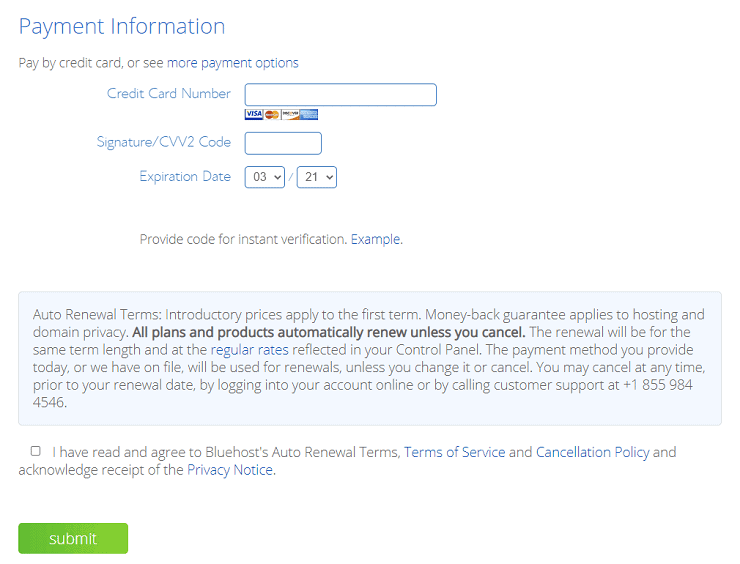
Provide your card details and click on the “submit” button. You can also pay with PayPal if you click on “More payment options” under Payment Information.
Finally, create your password for your account. That's it! You are now ready to install the WordPress blog.
3. Setting up your WordPress blog
For bloggers, WordPress is the best blogging platform. It is open-source, meaning it is free and has a lot of contributors. According to WordPress.org, 40% of online websites run on their platform.
I run this blog on WordPress, and here are my top reasons you should choose WordPress as your blogging platform.
- Free and Flexible – Self-hosted WordPress is free, and you will get lifetime updates. You don't have to pay a penny. With many free and paid themes available, you can customize your blog the way you like.
- Excellent Functionality – WordPress plugins help add additional functions to your blog. For example, you can add a shop to your blog or create a membership site by installing few plugins.
- SEO friendly – WordPress themes are designed in a way to be search engine friendly. Search engines like Google, Bing, Yahoo, and DuckDuckGo can easily index your blog and rank your content.
- Mobile responsive – Over 50% of my blog visitors come from mobile phones. WordPress themes are mobile-friendly and look great on any mobile device.
With Bluehost, you can install WordPress automatically with a single click. All you need is to do is create a password.
Once you installed WordPress, Bluehost will ask you to pick a theme. You can choose yours later by clicking on the “Skip This Step” at the bottom of the page.
Now click on the “Start Building” button, you will be redirected to the WordPress dashboard.
WordPress Basics
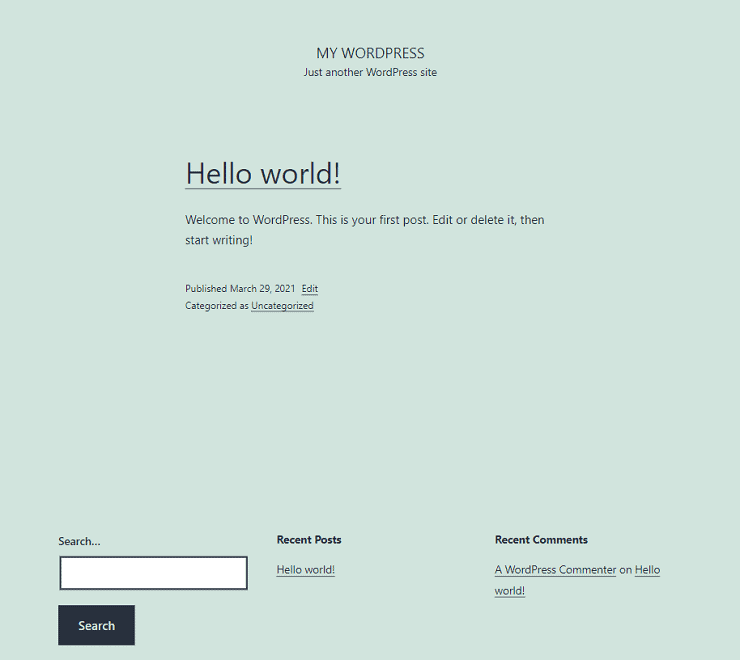
Your blog may look like the image below after installing WordPress, and you can visit your blog just by typing your newly registered domain name web address in any browser.
For example, if your domain name is “thecraftymom”, then https://thecraftymom.com will be your domain web address.
WordPress comes with an administrator dashboard, where you can write and update your content. You can also customize your blog look and feel in the dashboard.
How to login into the WordPress dashboard?
To login into your WordPress blog dashboard, add “/wp-admin.php” at the end to your domain web address in any browser. For example – https://thecraftymom.com/wp-admin.php. A page will appear like the image below asking for your username and password.
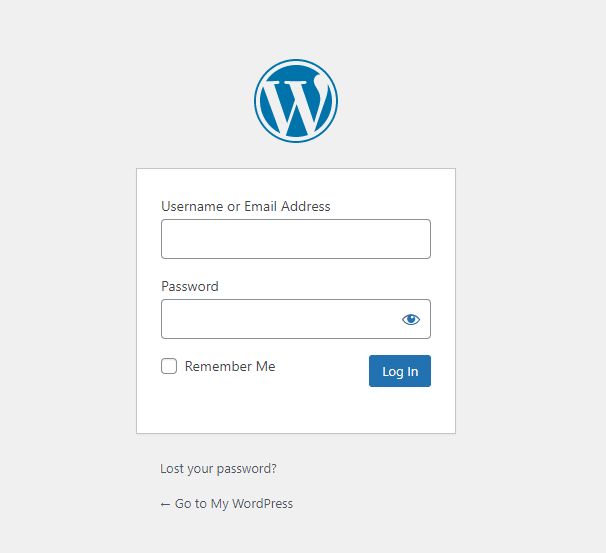
It is the same username and password you specified during installation. Enter details in the login form and click on the “Login” button.
Your blog dashboard will appear, and it will look like the image below.
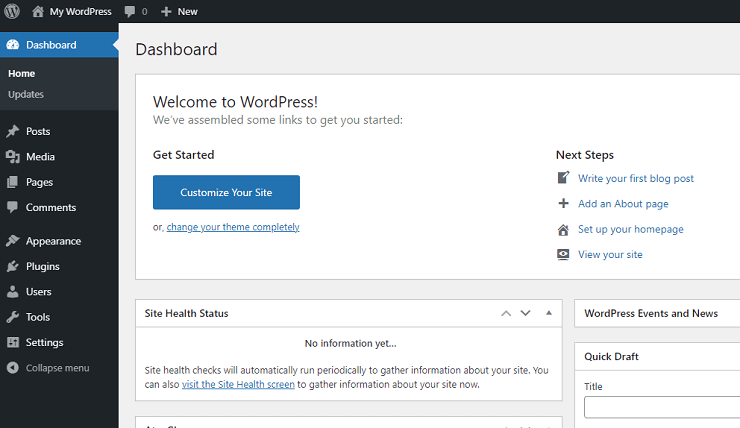
A panel that you see on the left is where you can access and customize your blog. Let's learn more about navigating this dashboard.
Posts – This will let you add new content or edit an old article. You can also create new categories and tags for your articles.
Categories can be your high-level blog topics such as Travel, Food, Money, DIY, and so on. And, Tags can be sub-topics of a Category.
Media – This is where you upload images, pdf files, and videos for your blog.
Media Library will also let you view and edit the uploaded images on your blog. You can crop and resize the photos using the Media Library image editor.
Tip: Always remember to write relevant Title and Alternative Text for your images while uploading.
Pages – This is to create static content for your blog, such as the About page, Contact page, License page, Privacy Policy, FAQs, and so on.
You can also create beautiful landing pages to capture customer emails using plugins like Elementor Pro with email marketing providers like ConvertKit.
Comments – Here, you can see all comments posted on your blog. You can reply, edit, or delete comments. I read and respond to all comments I get on this blog. It helps build trust with your readers and makes them more likely to engage with future content.
Appearance – This is where you customize your blog design and layout. You can install and customize new themes, create navigation menus for your blog, show widgets like the search bar, social media icons, recent posts, and other blog design options.
Plugins – Here, you can install or delete WordPress plugins. Plugins help extend your blog functionality.
Picking the right plugins is important because it affects your blog design, security, and performance. Further down this post, you will find my list of essential plugins to install for WordPress.
Users – This section shows you all the users that have access to your blog's administrator dashboard. Since this is your first blog, you will see just a single user, which Bluehost created while installing WordPress for you.
You can also add a new user to the blog to collaborate with other bloggers for guest posting.
Tip: For security reasons, never use admin as your username and always choose a more than 15 characters long password.
Tools – Here, you can import or export your blog data and check your WordPress blog's status.
Settings – This is where you provide information about your blog like the site title, tagline, date and time formats, blog post link appearance, and so on.
These settings are essential and should be assigned correctly. Because changing them, later on, is not the best option.
Important Settings for your WordPress Blog
1. Changing Site Title, Tagline, and Domain Name (URL)
Go to Settings -> General. You will see options to provide your blog's high-level information.
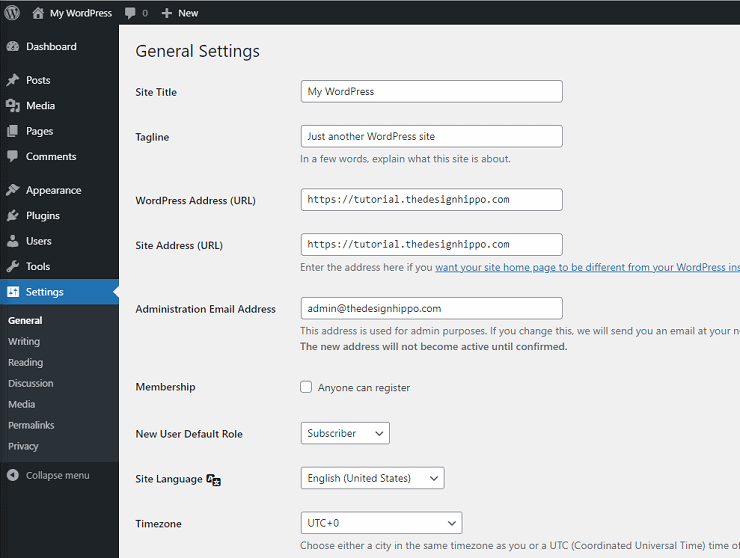
Site Title – Type in your blog name.
Tagline – Describe your blog in a few words.
WordPress Address (URL) – Enter your domain name web address (https://www.yourdomain.com).
Site Address (URL) – should be the same as WordPress Address.
Membership – By default, this option is disabled. If enabled, it will let readers create a user account to become subscribers.
This method of acquiring subscribers is not a good option because it will be challenging to send updates or promotional emails to them.
Instead, use email marketing providers like ConverKit to capture subscribers and send regular newsletters or promotional emails.
TimeZone – Select a city or country from the dropdown. You can select this based on your target audience.
You can leave the rest of the options as is and click on the “Save Changes” button.
2. Changing Homepage Settings
Go to Setting -> Reading. Here you can change how your homepage looks.
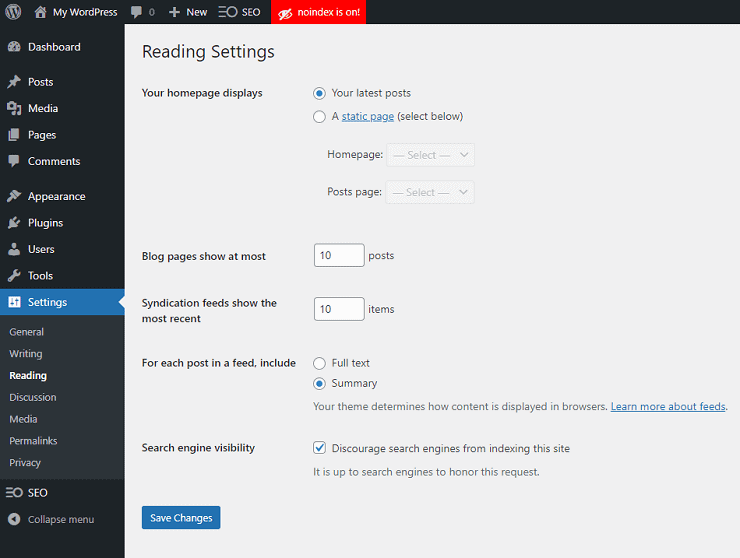
By default, the latest ten blog posts will be displayed on the homepage. For now, you can keep the first three options as it is.
Change the “For each post in a feed, include” option to Summary. It will show only the Summary of the blog post. Otherwise, the complete blog post content is displayed on the homepage.
Finally, disable search engines from indexing your blog by checking the “Search engine visibility” box. Since you don't have any blog posts published yet, it's better to disable search engines crawling your content.
Note: Remember to uncheck this option once you have published a few pages and posts. Otherwise, your blog will not get indexed on search engines like Google, Bing, etc.
Click on the “Save Changes” button.
3. Changing Comments Settings
Go to Settings -> Discussion. Here you can change how readers can post comments on your blog.
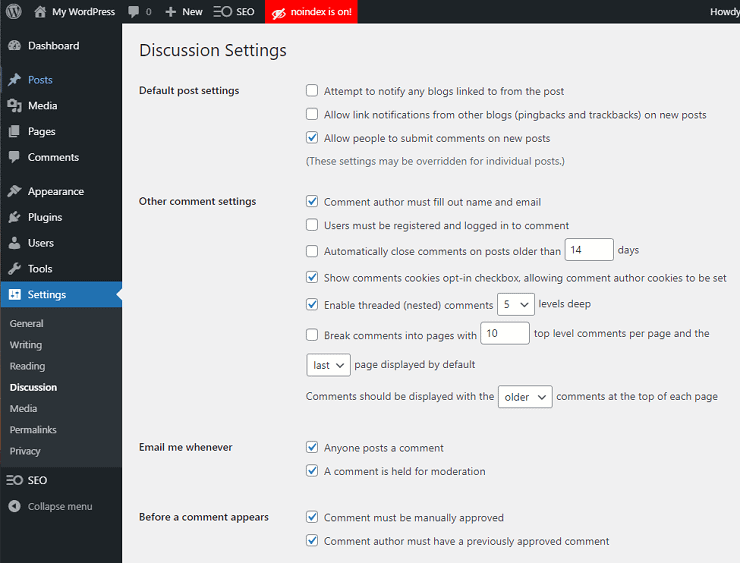
Under the “Default post settings” section, uncheck everything except the “Allow people to submit comments on new posts” option.
For security reasons, it is better to disable pingback and trackback link notifications.
Keep “Other comment settings” options as it is.
Under the “Email me whenever” section, check both options. You will receive an email notification when readers post a comment on your blog.
Check both options under the “Before a comment appears” settings. This option enables you to review the reader's comment before publishing it on the blog. If you want the comments to be published without any manual approval, uncheck the option.
Click on the “Save Changes” button.
4. Changing Permalink Settings
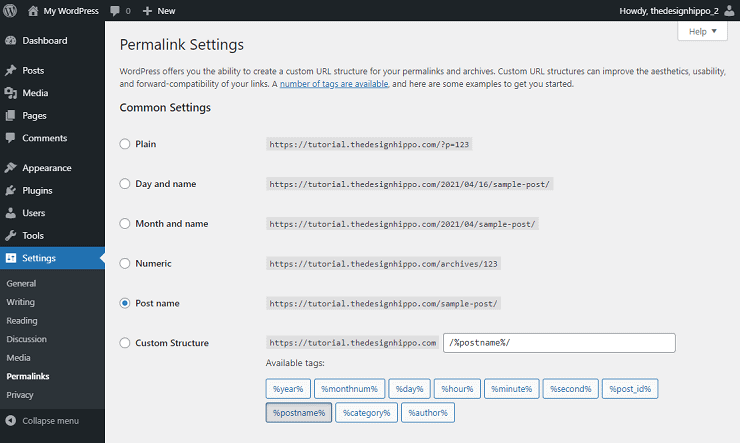
Go to Settings -> Permalinks. Here, you can change how your blog post URL appears on search engines and browsers. These are permanent links and should not be changed once assigned.
Under the “Common Settings” options, select the “Post name” to make your blog post URLs readable.
Bluehost will automatically assign this setting for you. If not, then follow the above step.
Also, Permalinks settings help search engines to understand the content of your blog post. In turn, it benefits your blog's SEO.
Click on the “Save Changes” button.
Congratulations! You installed your first blog and updated the necessary settings.
In the next step, I will go through installing themes and plugins for your WordPress blog.
4. Picking your blog theme and layout
It's time to set up your blog with a lightweight WordPress theme and necessary plugins.
Good blog design and layout are necessary to make a blog look pretty and increase reader engagement.
A theme determines how your blog looks. It will give you a basic layout for your blog, and you can then customize it to represent your brand.
Following are the necessary features you need to look for when selecting a WordPress theme –
- Well-Designed & Easy to Navigate – The WordPress theme should look good, be easy to navigate, and is optimized for speed.
- Search Engine Optimized (SEO friendly) – It needs to be optimized for SEO. SEO is essential to get indexed on Google, Bing, and other search engines.
- Responsive – It needs to be responsive across all the devices. Most themes provide a live demo. Check the theme in different web browsers, on desktop/laptop, and mobile.
The good news is that you can get any look you want using ready-made themes and plugins. No coding or technical expertise is required.
WordPress has a lot of both free and paid themes. Free themes don't offer much support or frequent updates. A little investment in purchasing a premium theme will save you a lot of time in the future.
With a premium theme, you will get regular updates and support for the theme from the developer.
Having an SEO-ready theme from the start will help you bring more traffic to your blog from Google, Bing, etc., from the get-go.
I recommend Bluchic themes because they are –
- Lightweight and Fast
- Search Engine Optimized
- Easy to use
- Lifetime updates
- Mobile responsive
- Minimal and Beautiful
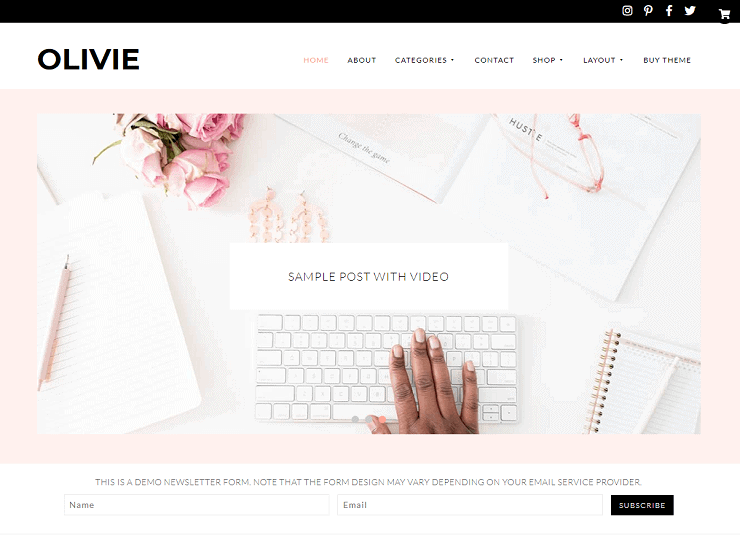
Olivie is a beautiful and well-designed WordPress theme. Suitable for all types of blogs like travel, crafts, lifestyle, food, money, etc.
How to install a WordPress theme?
When you purchase themes online, you will receive theme files in a zip folder. You need to upload the theme files manually, and the process is pretty straightforward. Let's learn how to install a WordPress theme.
In your dashboard, go to Appearance -> Themes. Here, you can see all the themes installed on your WordPress blog. The active theme will have a black ribbon and a customize button at the bottom.
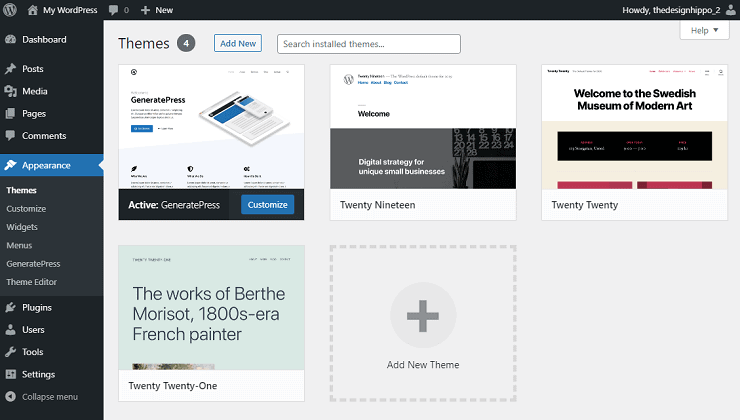
By default, WordPress installs and activates a standard free theme.
Check out Olivie WordPress Theme by Bluchic to have a beautiful blog ready easily and quickly. It is a clean, well-designed, and SEO-friendly theme.
Click on the “Add new” button. A page opens up like in the image below.
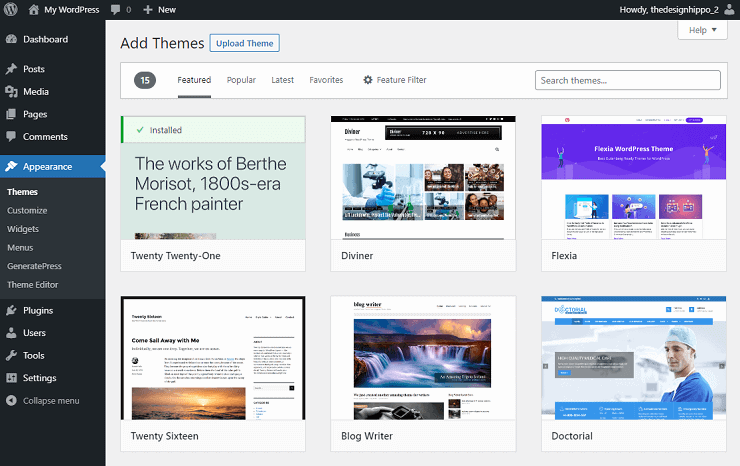
Click on the “Upload Theme” button. New options slide in asking for the theme files.
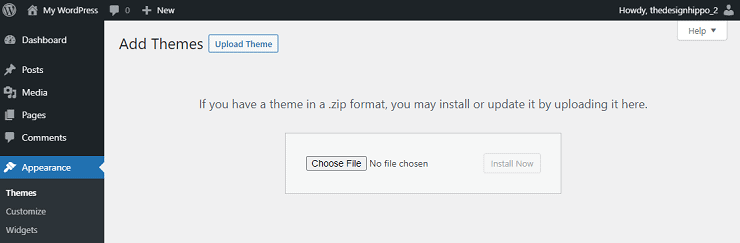
Click on the “Choose File” button, a File Explorer window will open. Go to the theme location on your desktop or laptop and select the theme zip folder. Now press the “open” button.
Click on the “Install Now” button to install your theme. Excellent! You have successfully installed your first theme. You need to activate the theme to use it.
Go to Appearance -> Themes. Now you can see your newly installed theme. Hover over to the new theme with your mouse and click on the “Activate” button. Visit your blog homepage, and you can see the new theme in action.
How to customize a WordPress theme?
To customize a theme, you can go to Appearance -> Customize. The theme customization window will open, and the menu to the left will show you the options to customize the theme, such as logo, fonts, colors, and more.
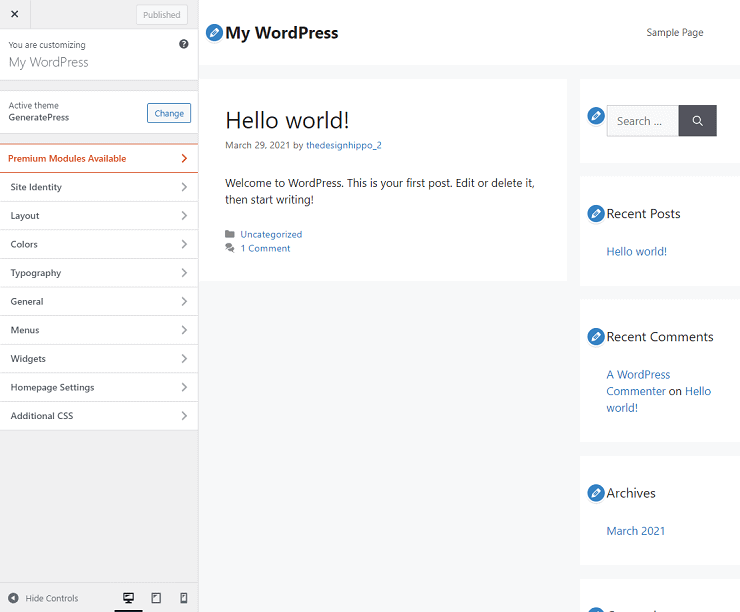
On the right, you have a preview window. Here, you can see all the changes automatically.
These customization options vary based on the theme. Your options to customize may look different than in the image shown above.
Click on the “Publish” button on the top to save any changes made to the theme.
5. Best WordPress plugins for your blog
Plugins are essential to run your blog and to add additional functionality. WordPress has thousands of free and paid plugins. Plugins help your blog in several ways, such as SEO, backup, speed, security, and more.
Tip: Keep your plugins to a minimum. There is no hard and fast rule on the number, but between 10 and 14 plugins will be good. Too many plugins on the blog will reduce the speed of the website.
To set up your blog for success, I am listing down the best Plugins to use. The below list contains both free and paid Plugins.
Akismet Anti-Spam
One of the biggest challenges of running a blog is getting rid of spam comments. To promote their content or product, users can post comments on your blog post with links.
With Akismet, suspicious comments will be automatically removed and placed under the spam folder. You can review these comments and publish or delete them.
It is free for personal use. All you need to do is create your account with the Akismet website, part of the WordPress parent company Automattic.
Elementor Pro
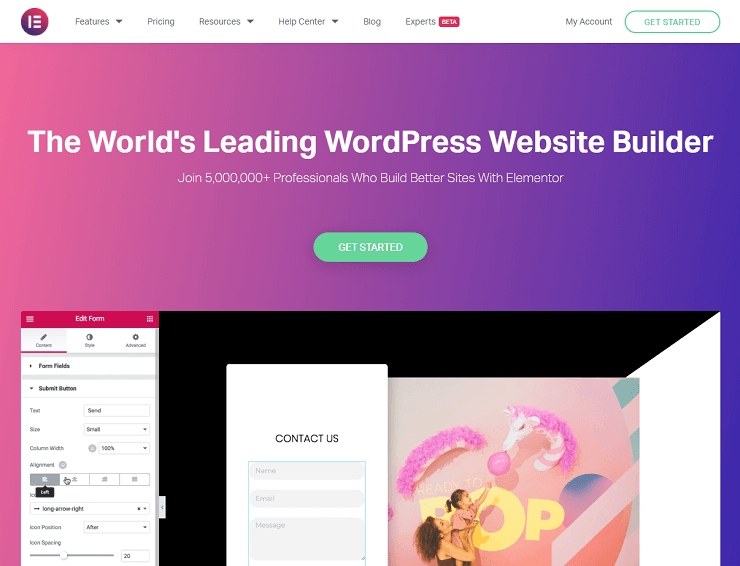
Elementor Pro is one of the best page builder plugins for WordPress. With Elementor Pro, you can create beautiful homepages, landing pages, contact pages, product pages, and much more.
Elementor Pro comes in with many built-in widgets. You can create contact forms or sign-up forms, show the latest posts by category, design your blog post layout, customize your footer and header.
Design possibilities are endless with Elementor Pro, and it is easy to learn as well. With the Pro version, you can access many ready-made templates to make a beautiful blog layout and design in just a few minutes.
SEO Press
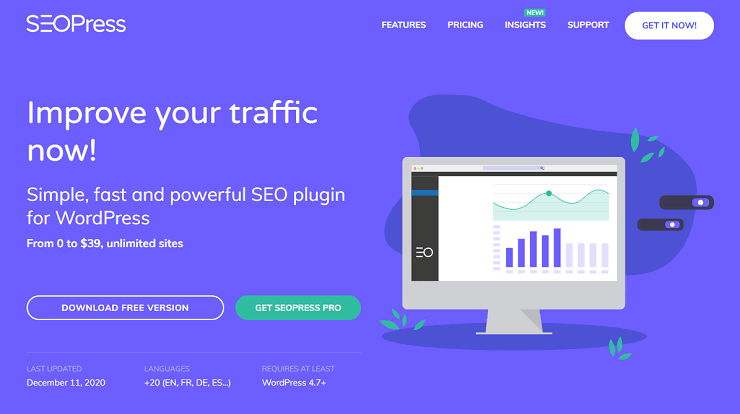
SEO is essential for running a successful blog online. You can edit blog post/page titles, descriptions, and social meta tags with the SEO Press plugin. You can also submit your blog sitemap to search engines.
SEO Press is one of the best SEO plugins available for WordPress. It is a freemium plugin and very easy to use.
Social Snap
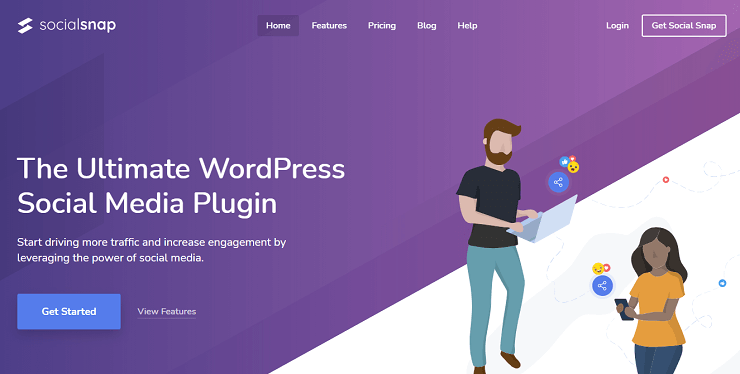
Social sharing is one of the most effective ways to increase blog traffic. When engaged readers share your content on their social networks, you increase your chances of gaining a new audience.
I use Social Snap Pro plugin on this blog and recommend it. It has both a free and paid version.
The paid version has many features. You can show share numbers for your blog post across various channels like Pinterest, Facebook, etc., on the page. You can easily customize the social share buttons' colors, size, and positioning to sync with your blog design and appearance. It has over 40 network share buttons such as Pinterest, Facebook, Twitter, Tumblr, and more.
Loginizer
By default, WordPress is safe and secure. But adding an extra layer of security is a must. Hackers are constantly trying to gain access to blogs so that they can extort money. Loginizer protects your blog admin login page from brute force attacks. After three failed attempts, it will lock the user out from further login attempts.
WPS Hide Login
Since WordPress is the most popular blogging platform, it has been targeted by hackers the most. The plugin “WPS Hide Login” adds another layer of security by masking your WordPress admin login page. With this plugin, you can change the /wp-admin.php login page to any name you like.
BlogVault
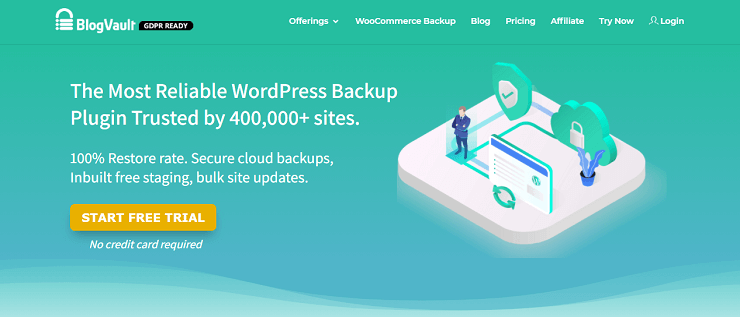
Imagine you have been working so hard and updating your blog regularly with blog posts and images. Suddenly, an unforeseeable event happened, and your blog is not working correctly. Having a backup and restoring ability will save you a lot of time and money.
I use and recommend the BlogVault plugin. BlogVault will automatically take a daily backup of your blog and stores it on Amazon Cloud Servers. It will hold 90 days of blog backup history, so you can restore it to any date you want in the past three months.
Additionally, BlogVault provides you with a Firewall to protect your blog from hackers. It also scans and removes any malware on your WordPress blog.
How to install a plugin in WordPress?
Similar to themes, purchased plugins also come in a zip folder. You need to upload the plugins manually, and the process is straightforward.
To install a plugin, go to Plugins -> Add New.
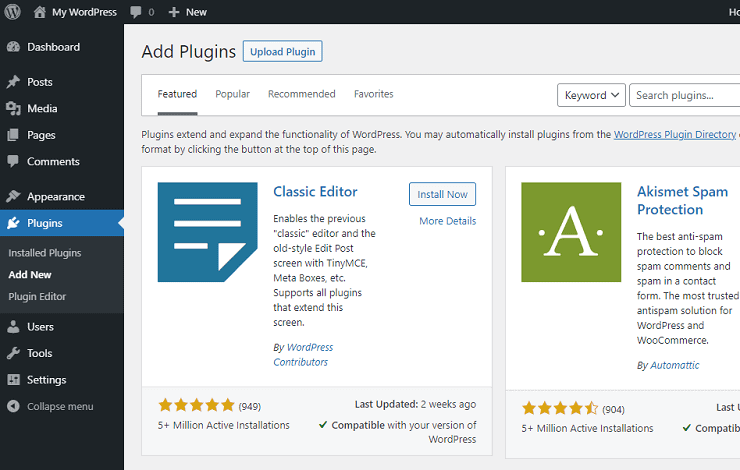
Click on the “Upload Plugin” button. New options slide in, click on the “Choose Files” button and select your plugin zip folder. Now click on the “Install Now” button.
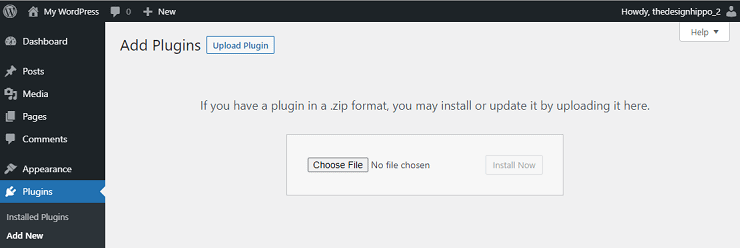
Here, you can also see the free WordPress plugins available for you to install. Just search for the free plugin in the search bar and click on the “Install Now” button.
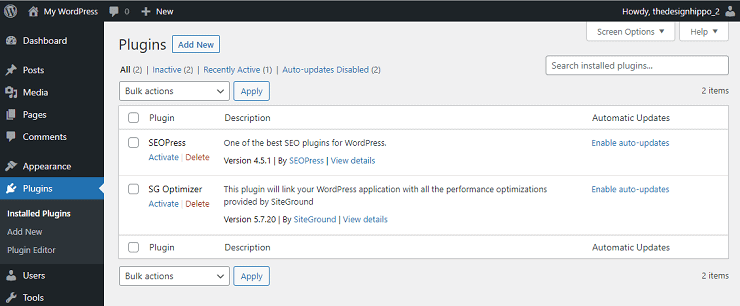
Whether you upload a plugin manually or installed it from the marketplace, you need to activate the plugin to use it. Go to Plugins -> Installed Plugins, here you can see all the installed plugins. From here, you can activate the newly installed plugins by clicking on the “Activate” button.
6. Writing blog posts that bring traffic
Congratulations! Your blog is now ready to host your awesome blog posts. Before writing any blog posts, let's look at the essential pages you need to publish first.
Important Blog Pages to Set Up
- Privacy Policy & Disclosure
- License Terms
- About
- Contact
Privacy Policy & Disclosure Page: Being transparent about your blog's data collection policies is important to establish trust with readers. A Privacy Policy should disclose the types of data you collect from your visitors, cookies, affiliate marketing disclosure, and copyright notice contact information.
You can generate this page content using online tools like freeprivacypolicy.com.
License Terms Page: If you are giving freebies to visitors, like printables, planners, checklists, then having a clear License page is very important. You can specify dos and don'ts for your freebies, whether for personal use or commercial use.
About Page: Having a well-written About page helps your readers know the person behind the blog. Share your journey and experiences that help build trust in your niche.
Contact Page: Having a contact page helps visitors reach you in case they have any questions. It also helps sponsors get in touch with you for marketing opportunities.
How to create a Page in WordPress?
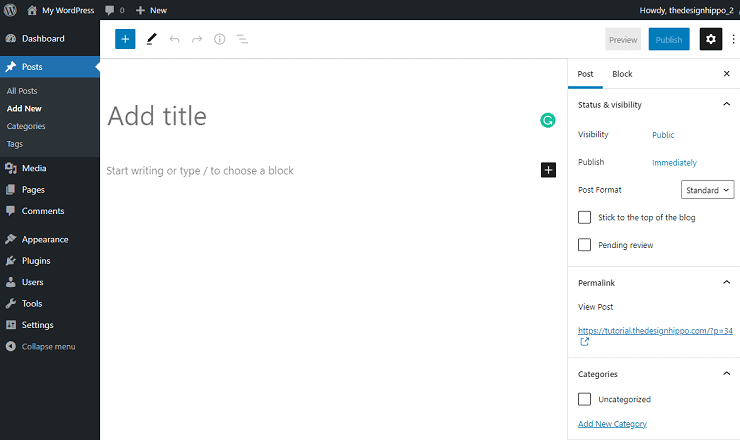
To create a page, go to Pages -> Add New.
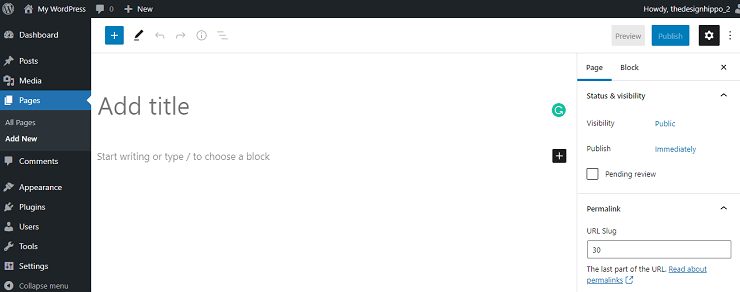
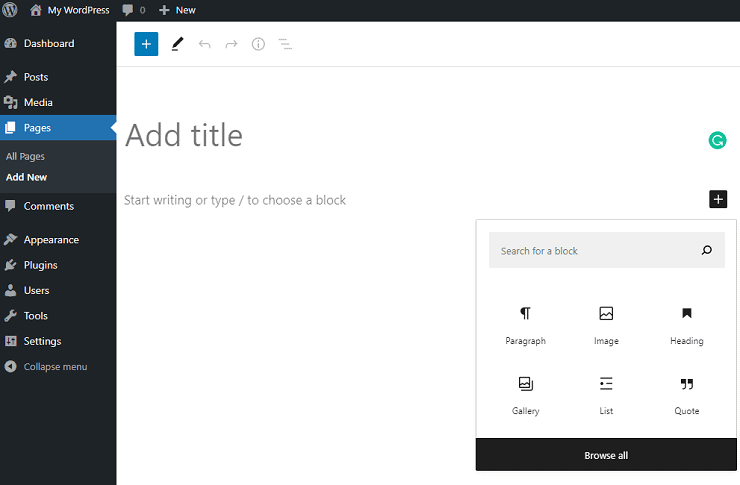
Type your title in the “Add title” section. Below that, you can start writing your page content. You can add headings, paragraphs, quotes, lists, photos, and more using blocks.
Tip: Remember to click the “Save Draft” button from time to time. WordPress autosaves your content every few minutes by default, but it is better to do it yourself. By doing so, you are making sure that your content and formatting are preserved.
Once you are done writing and editing your page, click on the “Publish” button to publish the page.
Content Research for Your Blog Posts
Now that we have set up your blog let's get to the juicy part – writing amazing content!
If blogging is a hobby for you, then writing what you want on your blog is a good idea. But if you plan to make money through your content, you need a process in place for researching and writing blog posts that will rank on Google and other search engines.
When you are writing blog posts, it's a good idea to ask the following questions –
- Search volume – An estimation of the search volume for your target keywords.
- Money-making opportunities – Once your blog post starts getting traffic, can you make money through affiliate marketing or selling your products or services.
- Competition – Look at the top results on google search for your target keyword to analyze existing blog posts. What information are they providing, and if can you provide a much better answer?
There are a bunch of free and paid keyword research tools you can use for your research –
- Ahrefs – It is an all-in-one SEO solution. You can perform keyword research, competitive analysis, content analysis, and so much more. It is a paid tool, but they have a free trial available for seven days.
- Keywords Everywhere
- Keywords Surfer
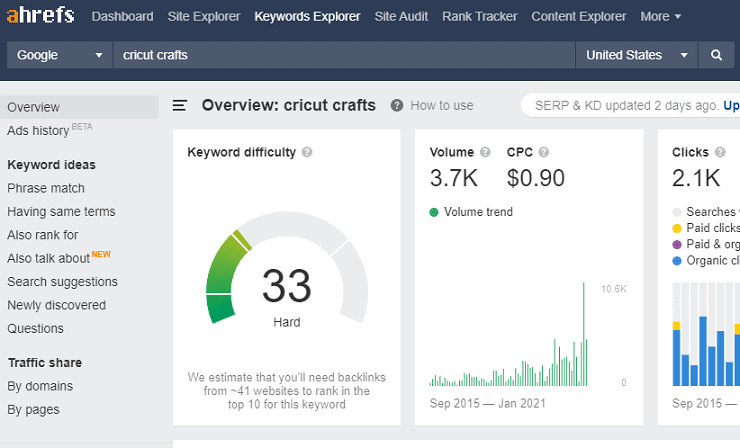
I highly recommend Ahrefs. I have been using it for a while now, and it is an excellent tool for keyword research and competitive analysis.
As Ahrefs offers excellent research capabilities, it does come with a price tag of around $100 per month. So my suggestion would be to sign up for the seven-day trial and do your initial research.
Start with free research tools, and once your blog grows, you can purchase premium tools. Both Keywords Everywhere and Keywords Surfer are free Chrome browser extensions. They both display information right in your Google search window. You can get keyword ideas, search volume, and competitive data analysis.
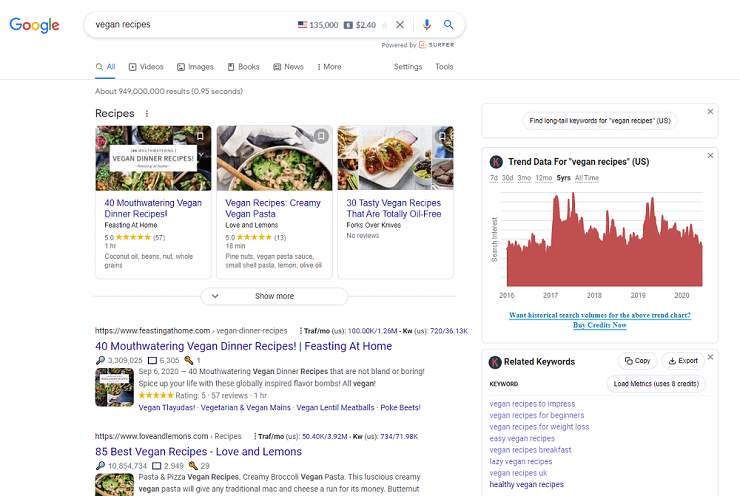
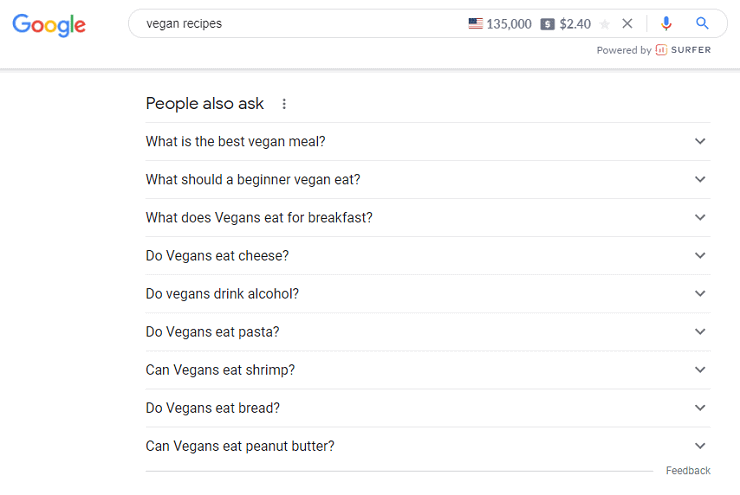
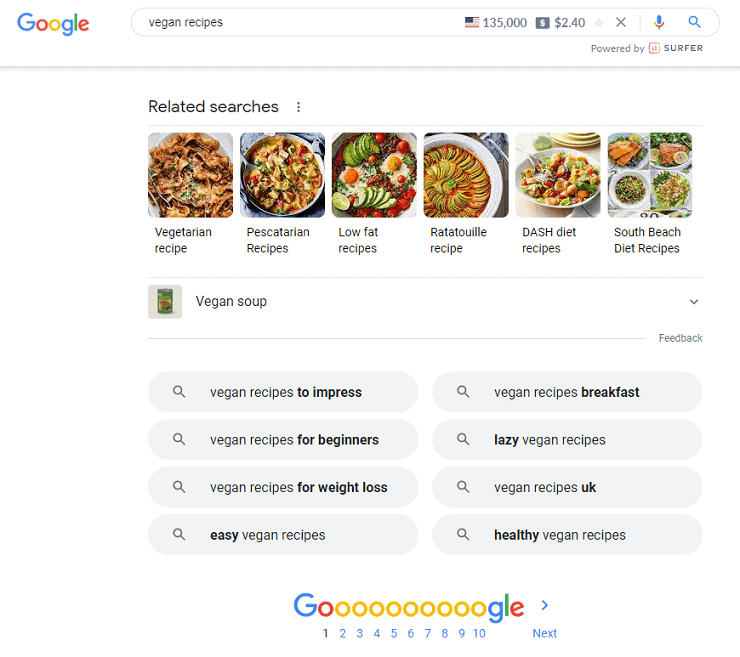
Also, Google Search is an excellent place to start researching your topic ideas. Especially look for “People also ask” and “related search terms” at the bottom of the search results.
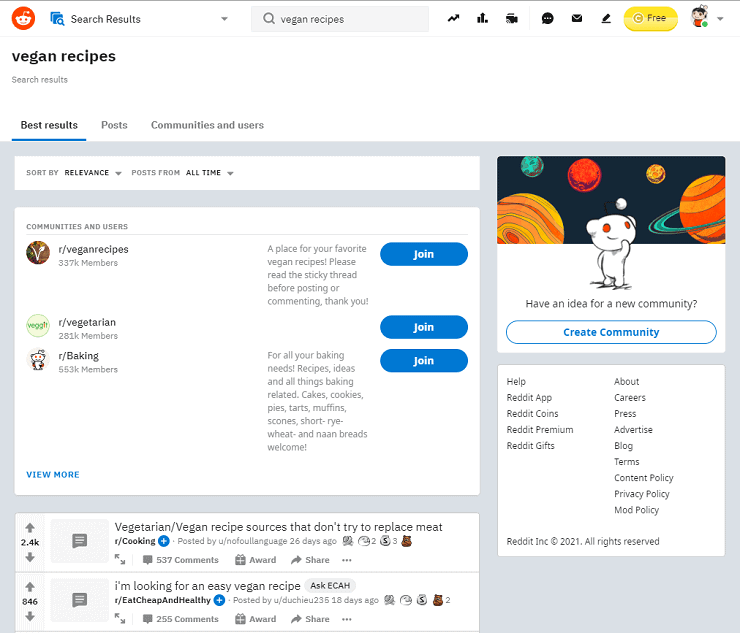
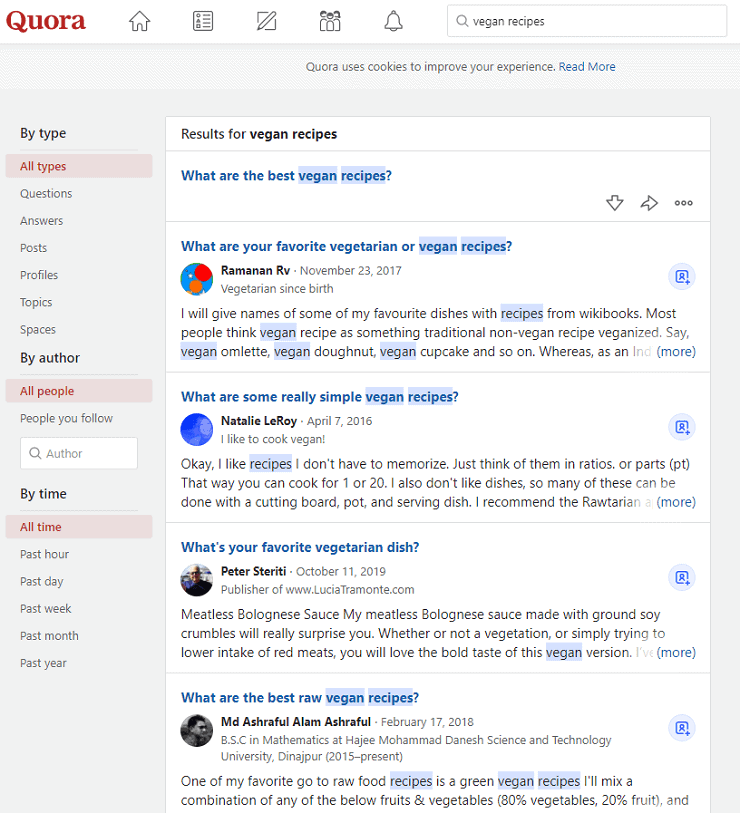
Additionally, you can also look at online discussion forums like Quora, Reddit to get topic ideas.
Once you have identified a cluster of keywords to target, you can start writing your blog posts.
There are different types of articles you can write, and the following are the most popular types of blog posts –
- List posts (example: 9 best ________)
- Step-by-step beginner's guides
- How-tos/instructional posts (like this article that you are reading now)
How to structure your blog post?
Whether a list post or a beginner's guide, you need to structure and format your blog post. The better the readability of the post, the more time readers will spend on your blog. Having the right structure also ensures Google indexes your blog content effectively.
Here are my tips for structuring your blog post –
- Headings – Make use of the different levels of headings to break lengthy blog posts into more readable sections. Your blog post title is H1, so don't use another H1 in your blog post content. Headings should follow the hierarchy, H1 -> H2 -> H3 -> H4, and so on.
- Easy to read paragraphs – Break down your content into small and easy-to-read paragraphs. Write only two or three sentences in a paragraph to make it more readable to the visitor.
- Beautiful Images – Insert eye-catching or informational images in between paragraphs on your blog post.
- Bullet points – Insert bullet points or numbered lists in your content where necessary.
- Summary/Conclusion – Summarize your blog post at the end in bullet points to readers and advice your readers on their next steps.
How to add a new blog post?
In your dashboard, go to Posts -> Add New.
Type your blog post title in the “Add title” section. Remember that the first 60 characters of your post title will appear in the Google search results. Make sure to mention your target keyword or query in the title.
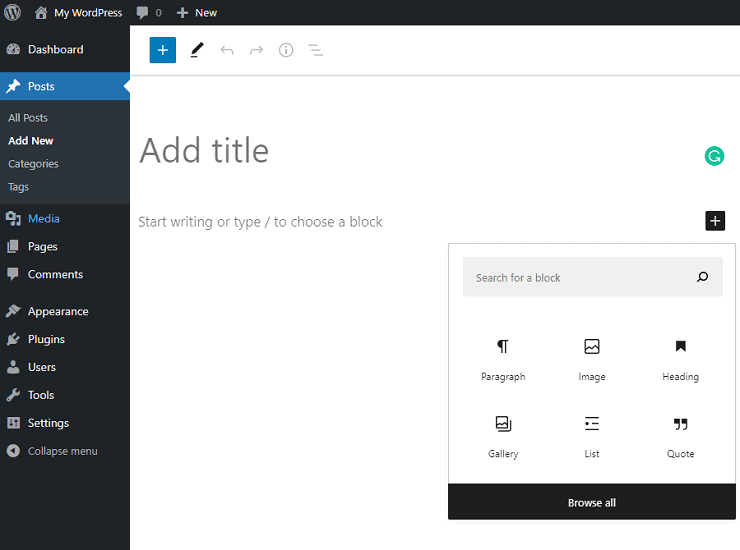
You can start writing your blog post content below the title. Like pages, you have several blocks that you can use, such as headings, paragraphs, images, lists, etc. Make use of these blocks to structure your blog post content.
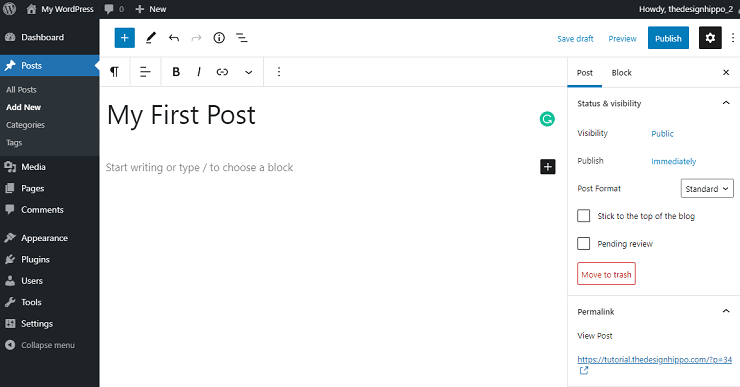
Make sure to click on the Save Draft button from time to time to save your blog post content and formatting.
On the right-hand side, you can see a panel showing post and block options.
Under the post section, you will see the following options –
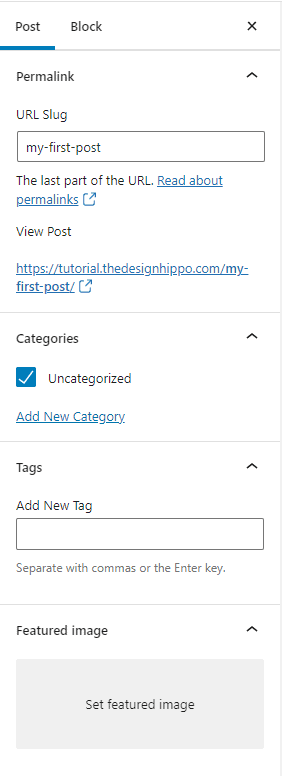
1. Permalink – change your URL Slug to a more readable format and make sure to mention your target keyword. It will help you get indexed on Google search for that keyword.
For example: If your blog post title says “10 best digital products to sell on Etsy”, then the URL slug will look like 10-best-digital-products-to-sell-on-etsy by default. Change this to a more readable form like best-digital-products-to-sell-on-etsy.
2. Categories – here, you can select categories or create new ones for your blog post. Categories help organize your blog content and also play an essential role in user navigation.
Alternatively, you can create new categories by going to Posts -> Categories. Here, you can also edit or delete any existing categories.
Your blog post can be in multiple categories but make sure not to assign too many. You will end up with duplicate content, and it is not good for SEO.
3. Tags – similar to Categories, you can specify tags for your blog post. They are like sub-topics of a Category and need to be comma-separated.
4. Featured Image – here, you can upload your blog post's main image. It is used as a display photo for your blog post while showing posts in the Categories section or homepage.
These are the four essential options you need to fill in every time you publish a blog post.
After you are done writing and editing your blog post, you can preview it by clicking on the Preview -> Preview in new tab.
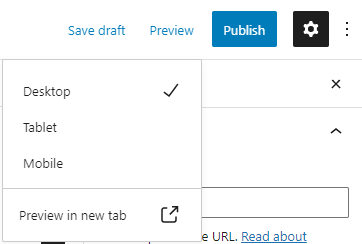
Once you are okay with your blog post, click on the Publish button to publish your blog post.
Publishing your blog post does not automatically mean that it will be indexed by Google immediately. To ensure that Google indexes your content, you can submit your blog to Google Search Console.
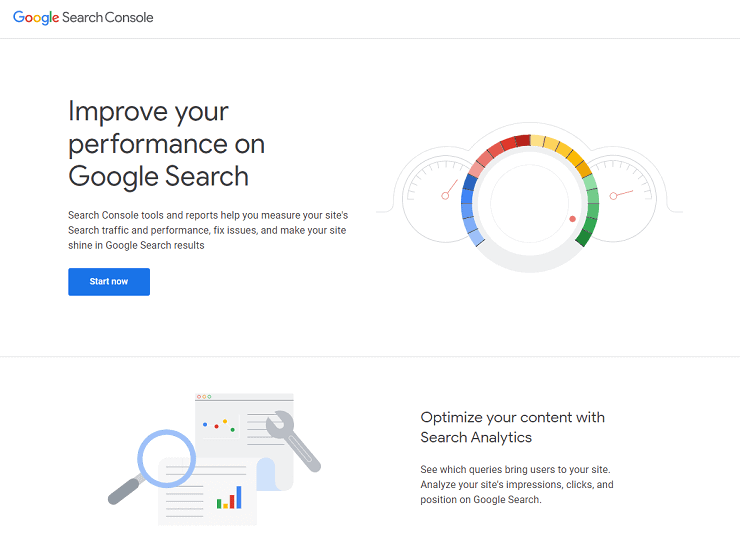
Google provides a free service to blog owners to submit their blogs to Google Search. You can sign up using your Gmail account and provide your blog URL.
Google then visits your blog and indexes the content for different search terms. It will take at least a month or two to index your blog once submitted.
Google also provides you with a dashboard to look at your blog's performance in the search results, keywords your blog ranked for, the number of backlinks your blog has, and much more.
Getting traffic from Google search is challenging, so you need to write articles wisely and implement the best SEO practices. Start by targeting low competition and long-tail keywords in your blog posts. Having a regular publishing schedule helps bring traffic to your blog.
7. Promoting your blog posts
Once you have published content, the job is not yet done. Promoting your blog posts is as important as writing them.
Getting the word out there to your target audience and turning them into repeat visitors to your blog is crucial.
Social Media
There are several Social Media platforms to promote your blog. Millions of visitors browse these platforms every day, and Social Media is one of the best ways to bring blog traffic.
To name a few, Facebook, Pinterest, Instagram, Twitter, and Tumblr. Understand your niche and where most of your target audience is active. For my blog, I love Pinterest, and it is my go-to social media platform to bring traffic to my blog.
You don't have to focus on multiple platforms at once. Start and master one before concentrating on others.
I use Pinterest, and it is excellent for visuals, informational articles, and step-by-step guides. Pinterest is best for travel, food, art, money, home decor, fashion, lifestyle, and many more topics.
Consistency and frequency are the keys to be successful on any social media platform. There are several automation tools available for you to schedule your social media posts. Investing in these tools helps you boost your blog traffic quickly without manually posting.

I use the tailwind app for Pinterest to schedule my Pins. It is easy to use, and you can schedule pins for weeks at a time. You can join Tailwind Tribes to join content creators in your niche and share each other's blog posts on Pinterest.
Email List
Having an email list for your blog will help bring repeat visitors and turn them into followers.
Build your email list by offering freebies or any other valuable resources in your niche. These could be checklists, ebooks, or planners. Your email list will also help market your products or services in the future.
You can use email marketing providers like ConvertKit to capture and store your subscriber details. ConvertKit provides a free subscription for up to 1000 subscribers.
With ConvertKit, you can send newsletters, promotional and update emails to your subscribers. Additionally, ConvertKit allows you to do affiliate marketing in emails as well.
Other ways to promote your blog
There are few other ways to promote your blog, but it requires time and money. I use and recommend the three strategies mentioned above to promote this blog. The below list is to make you aware of other available options.
Guest Blogging: You can reach out to other bloggers in your niche to write articles and to get a link back to your blog.
Paid Advertisements: You can run ads on Google, Facebook, Instagram, and Pinterest to bring traffic to your blog. In my opinion, this is not the most effective way to bring traffic to your blog.
Blogging takes time. To see any results, you need to wait for at least six months to a year. Just enjoy the process and have fun while doing so by providing value to your readers.
8. Make money from your blog
Let's get to the money matters! There are several ways to monetize your blog. No one solution fits all. The best monetization method for you depends on your niche and the financial goals you set for your blog.
Here are the most popular ways to make money blogging –
- Affiliate Marketing
- Display Ads
- Selling Own Products (like Digital Downloads, Online Courses, etc.)
Affiliate Marketing
This is my favorite way of making money online. It is a passive way of earning money from your blog.
Affiliate marketing is promoting another person's products or services by writing blog articles that are helpful to readers. By generating leads and sales to the products or services, you will earn a commission on sales ranging from 4% to 50%, depending on the affiliate program.
When you enroll in any affiliate program, you get a unique tracking link. You can place that link in your blog articles. When someone clicks on the link and purchases a product or service, you will earn a small percentage of the sale as a commission.
You can apply for the Amazon affiliate program to promote any physical products in your blog niche. Amazon pays up to a 4% commission on each sale, and you have tons of products to recommend.
Research your blog niche to understand what kind of affiliate marketing opportunities are there. Apply to these programs and promote their products on your blog.
Display Ads
Like TV ads, you can display ads on your blog to make money. It is one of the easiest ways of making passive income from your blog. You need to apply for an ad network to show ads on your blog.
You can start with Google Adsense, and it doesn't have any minimum traffic requirement to apply. Adsense pays around $3 per 1000 page views if most of your blog traffic is from English-speaking countries.
Other ad networks that pay well are Mediavine and AdThrive. Depending on your niche, the RPM can range from $25 to $50. They both have minimum traffic requirements to apply. Once you have reached the minimum traffic threshold, you can apply for any one of these networks.
Selling Own Products
Sell your products or services to readers to make money from your blog.
You can sell anything, digital products like printables, planners, cut files, etc., or online courses. These are the best because you make them once and you can sell as many as you want. Selling digital products is another best way of making passive income from your blog.
WordPress has a free eCommerce plugin called WooCommerce. You can use WooCommerce to set up a store on your blog and start selling digital products or services. It is easy to use and can integrate with PayPal or Stripe for payments.
There are other ways of making money from blogging, like sponsored posts, consulting work, etc.
Final thoughts on making money blogging
Can you make money blogging? Absolutely, Yes! But it takes time and effort. Blogging is not a get-rich-quick scheme. Through blogging, you will learn a lot about business and how online money-making works.
Just start your blog today! It's never too late to make money online. Stay focused and enjoy the process.
Summary
You made it! Congratulations! You now know the basics of a blog set up, promotion, and how to make money from your blog.
Here's a summary:
- Choose your blog niche – Research and narrow down your blog niche.
- Pick a domain name and web hosting – Register your domain name and buy web hosting from Bluehost.
- Install WordPress – Use Bluehost's automatic feature to install the WordPress blogging platform.
- Blog Design & Layout – Use Bluchic's Olivie WordPress theme to design your blog.
- Essential WordPress Plugins – Install essential plugins to run your blog.
- Content Writing – Create necessary pages first. Use online tools like Ahrefs, Keywords Everywhere, Keywords Surfer, and Google Search to get ideas for your blog articles. Focus on low competition and long-tail keywords.
- Promote your blog – Use Social Media and Email Marketing to promote your blog.
- Make Money from Blog – Run display ads, do affiliate marketing, and start selling your products or services.
This blog post is all about how to start a blog and make money.
If you have any questions about starting a WordPress blog, please comment below, and I am happy to help.
If you like reading this article, please share it with others 🙂