Whether you are downloading free SVGs online or purchasing from marketplaces such as Etsy or DesignBundles, chances are your download is a zipped folder. The reason being, designers offer designs in multiple file formats such as SVG, DXF, JPEG, PNG, and more. As crafters use different cutting machines(Cricut, Silhouette, etc.) and every machine type works with a different file format, putting all the files together in a zipped folder helps. In this scenario, we need to unzip the folder first.
In Windows, we can either use the inbuilt extractor tool or third-party applications such as 7zip or WinZip to extract the files from a zip file.
In this easy step by step tutorial, we will learn how to use Windows inbuilt extractor tool to unzip a file.
Make sure to pin this to your Cricut Tutorials board on Pinterest for future reference.

Step 1 – Go to the folder containing the zip file.
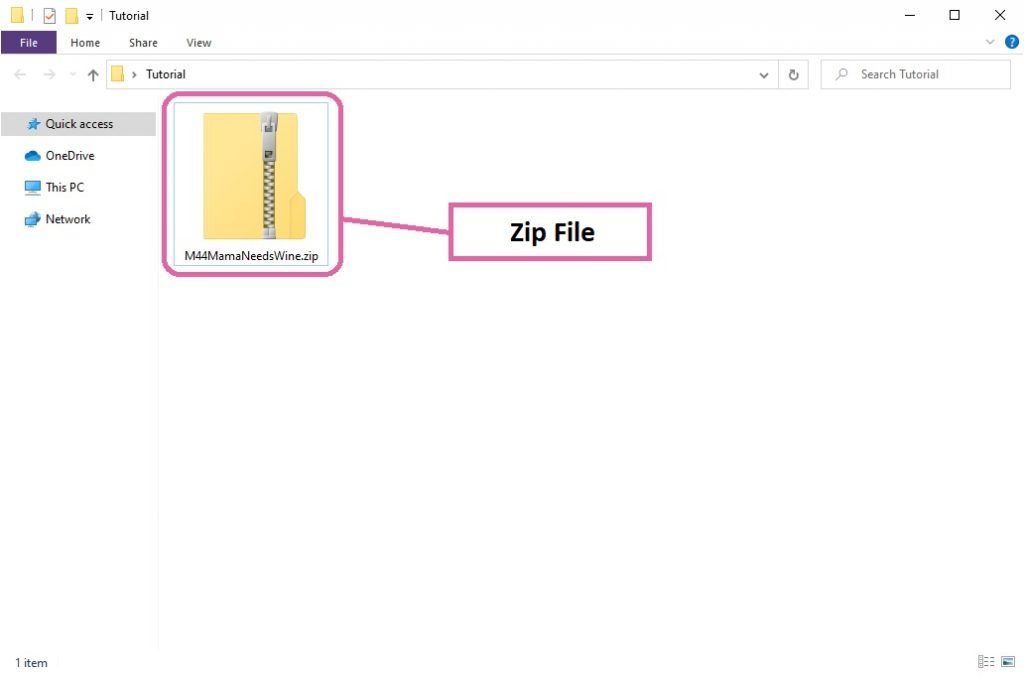
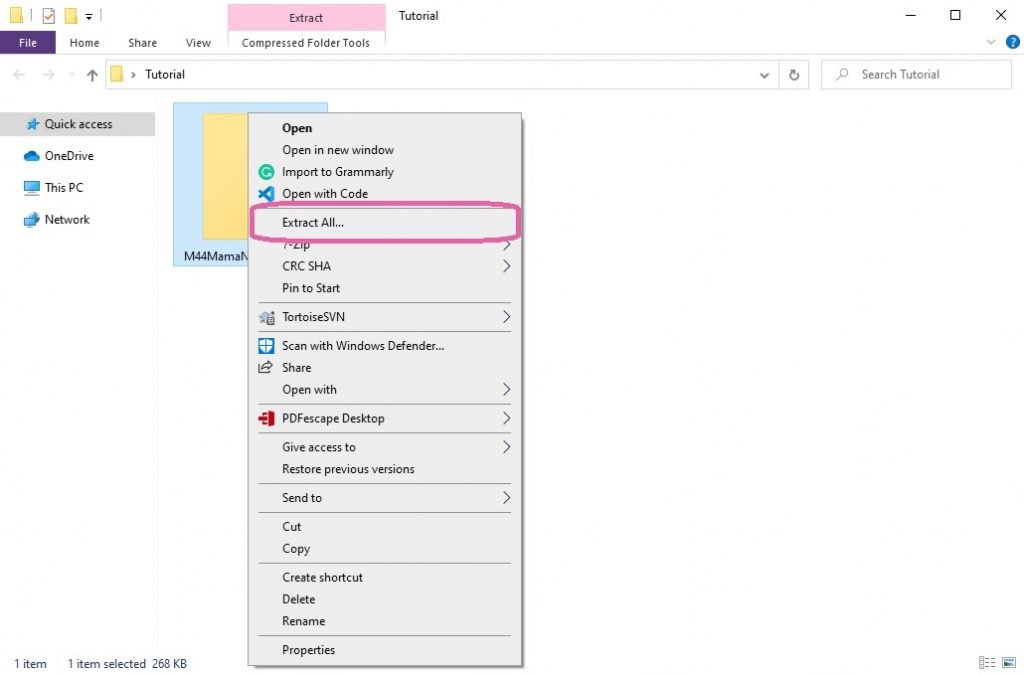
Step 2 – Right-click on the zip file and select “Extract All…” option.
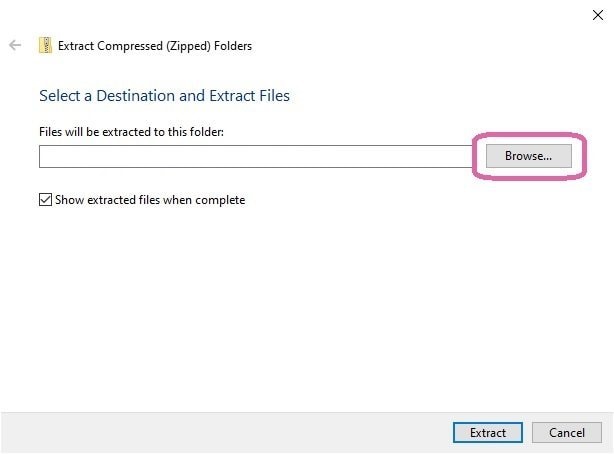
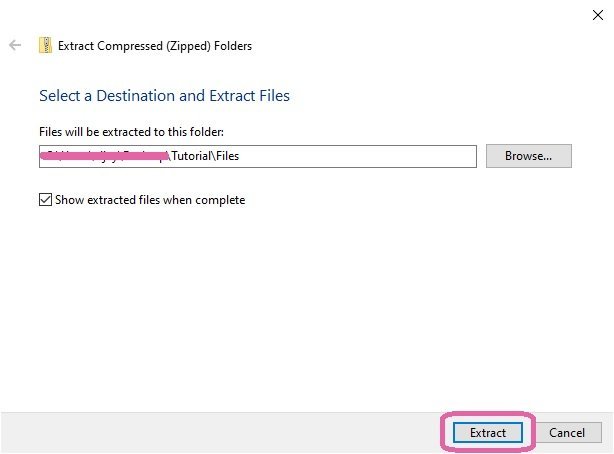
Step 3 – “Extract Compressed (Zipped) Folders” window will pop-up, click on the “Browse” button.
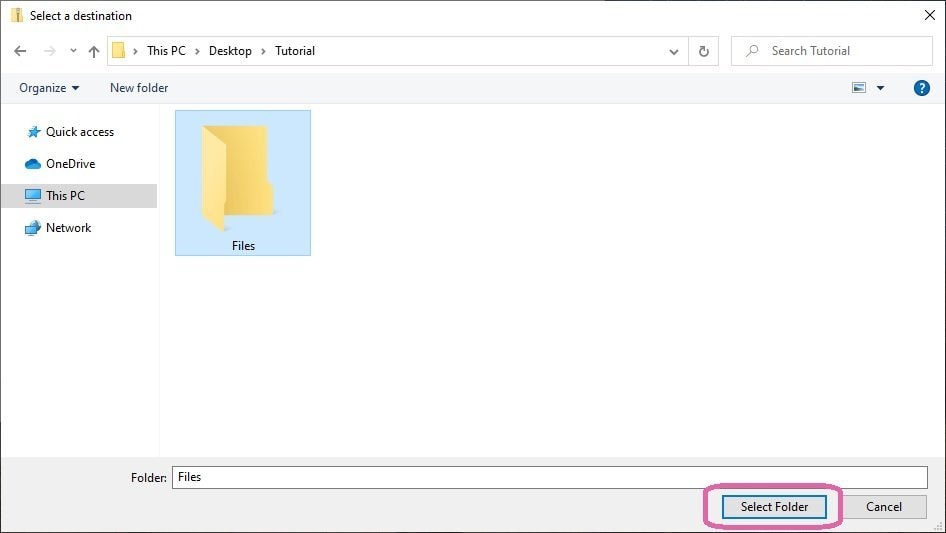
Step 4 – “Select a destination” window will pop-up, choose a folder to extract the files and click on the “Select Folder” button.
Step 5 – Now click on the “Extract” button to unzip the files. Check the option “Show extracted files when complete” to see the unzipped folder once the extraction is done.
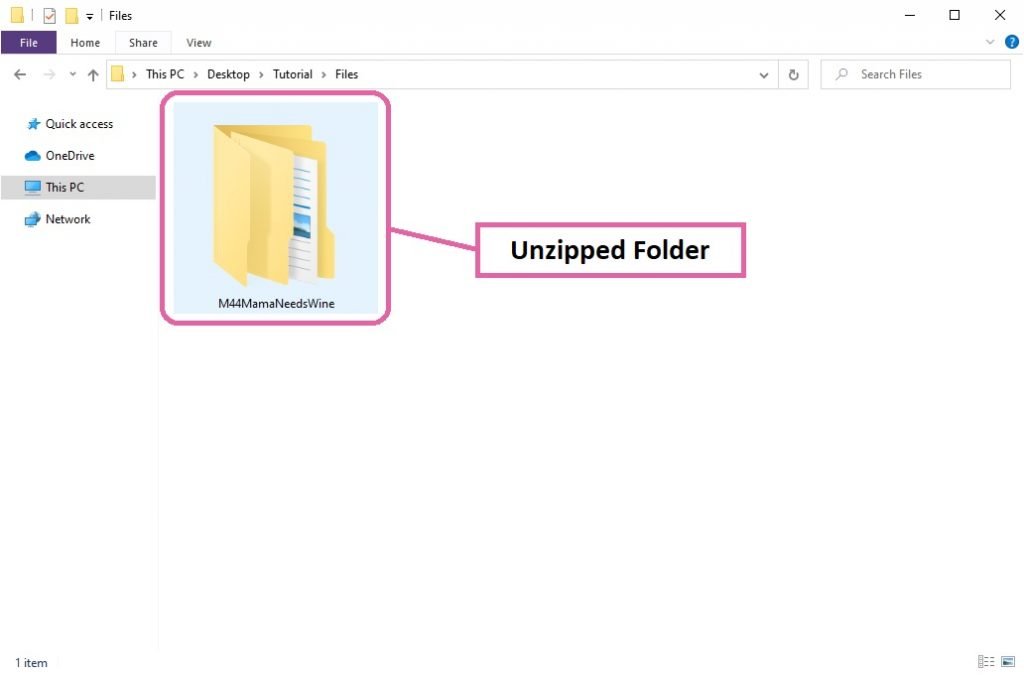
Double click on the unzipped folder to view the files. You can then upload the SVG file from the folder to your Cricut Design Space. I have a tutorial about how to identify SVG file from your download and uploading it to Cricut Design Space. You can find the tutorial here.
To download free SVG cut files, visit the cut files section of my blog.
