Follow this easy step-by-step guide to learn how to use DXF files in Silhouette Studio.
I have had a lot of fun using the Silhouette Cameo 3 for crafting for the past few years, making stickers, 3D pop-up cards, shadowbox cards, and more.
I made my own templates in Illustrator, exported the DXF files, and then imported the DXF file to the Silhouette Studio Basic Edition and cut the design.
Other file formats that work with the Silhouette Studio Basic Edition include PNG, JPEG, and Studio files.
If you plan to purchase designs from marketplaces like Etsy, DesignBundles chances are that designers don’t offer Studio files. This is because Studio files are a proprietary software file type and can only be found in the Silhouette Design Store. If you have the Silhouette Studio Designer Edition, then you can import SVG files.
For cutting cardstock or vinyl, we can use DXF files. Alternatively, we can also trace the design from a PNG or JPEG file (image file types) and cut it.
For best results, use high-resolution PNG files while tracing the design. But I prefer using DXF files as they are easier to work with.
Ready to upload DXF files to Silhouette Studio software? The tutorial is in two parts. In Part-1, we will go over the basics of the software and file types. In Part-2, we will learn how to import and use DXF files in Silhouette Studio.
Make sure to pin this Silhouette tutorial for your future reference.
Basics of Software and File Types
Silhouette Studio is the downloadable software program developed by Silhouette America that can be installed on our computers/laptops to connect with Silhouette Cameo or Curio cutting machines.
The Basic Edition of the Silhouette Studio is free. You can download it here. Always remember to update your software to get the most out of your cutting machine. With their recent update, v4.3.372*, the rendering of the DXF file has improved a lot. This, in turn, helps cut the design more quickly.
* version number may vary by the time you are reading this post.
With the Basic Edition of the software, we can’t use SVG files. We need to upgrade the software to Designer Edition to be able to use SVG files.
The main advantage of using DXF & SVG files is that we can increase the size of the design without any loss of quality, unlike image files such as PNG and JPEG.
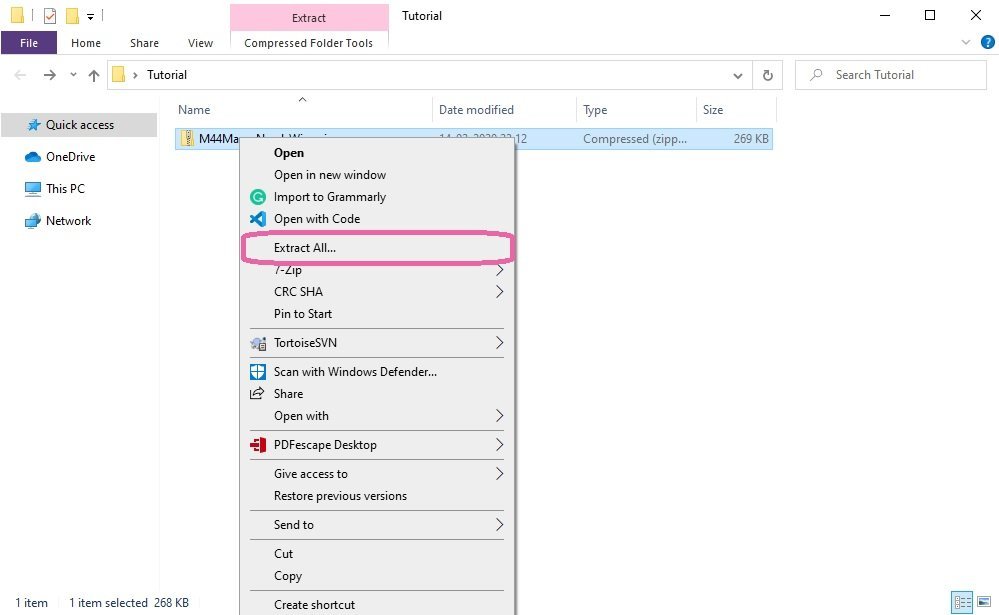
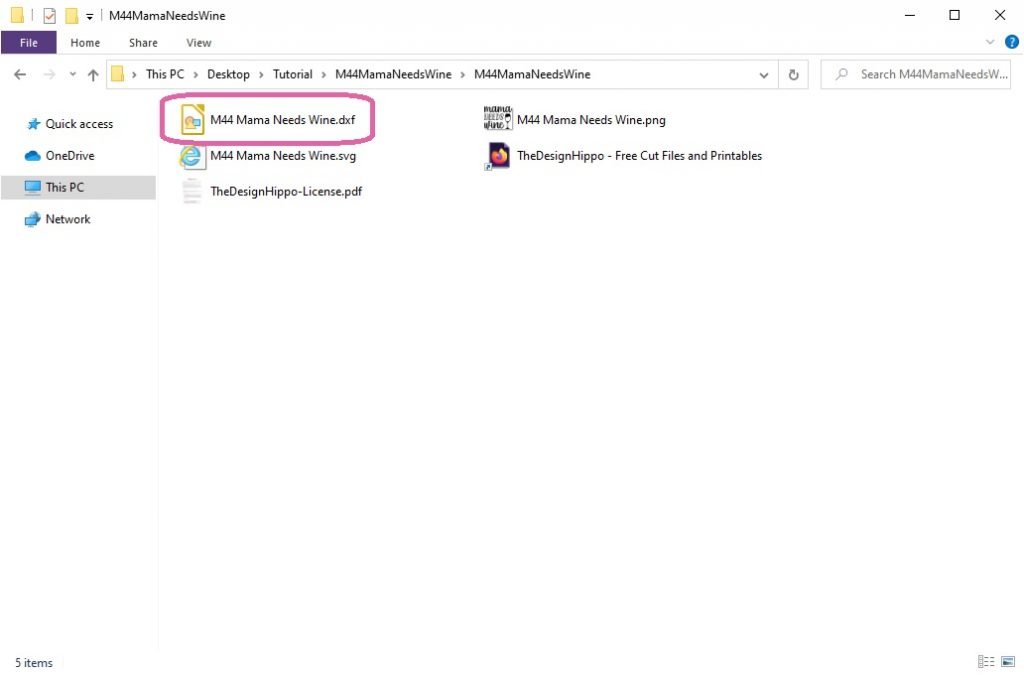
If you are buying your DXF files from online marketplaces such as Etsy or DesignBundles or downloading for free, the chances are that they come in a zipped folder.
Designers offer designs in multiple file formats such as SVG, DXF, JPEG, PNG, and more. As crafters use different cutting machines(Cricut, Silhouette, etc.) and every machine type works with a different file format, putting all the files in a zipped folder helps. In this scenario, we need to unzip the folder first.
In Windows, you can either use external programs such as 7zip(my favorite) or WinZip to extract the files or right-click on the zipped folder and select the “Extract All” option to extract the files to your desired location.
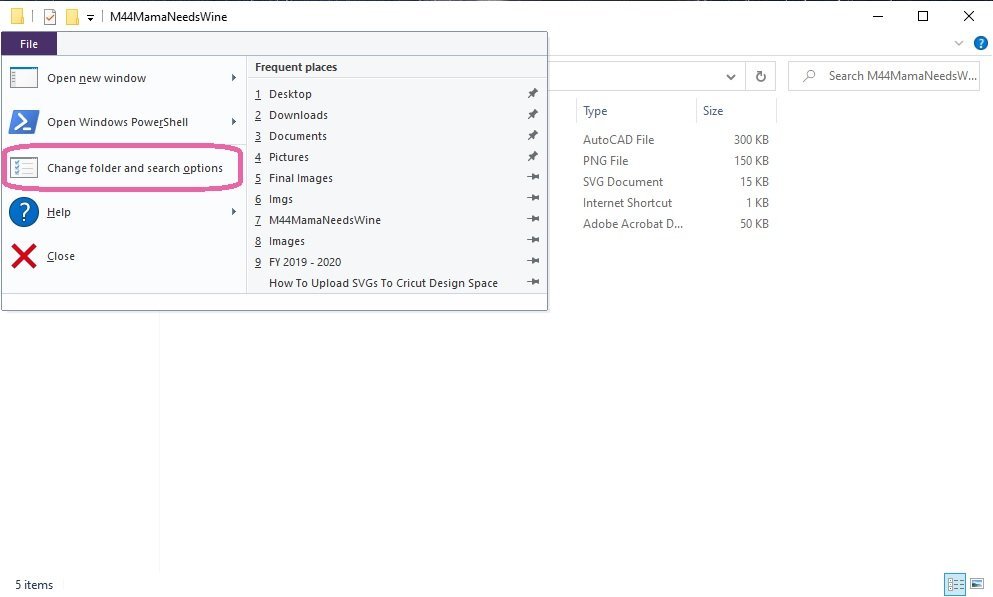
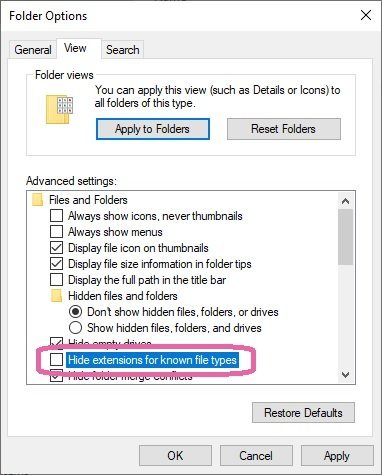
If you are a Windows 10 user, it is better to enable the file extensions in your folder options. This will help you identify file formats.
To enable this option, open any folder and click on “File” -> Select “Change folder and search options”. This will pop up a window called “Folder Options”, click on the “View” tab -> uncheck the option “Hide extensions for known file types” -> click “OK”.
Now we can see the extension of any file in your computer/laptop. For example, your downloaded folder should show the DXF file as “filename.dxf”.
How to use DXF files in Silhouette Studio?
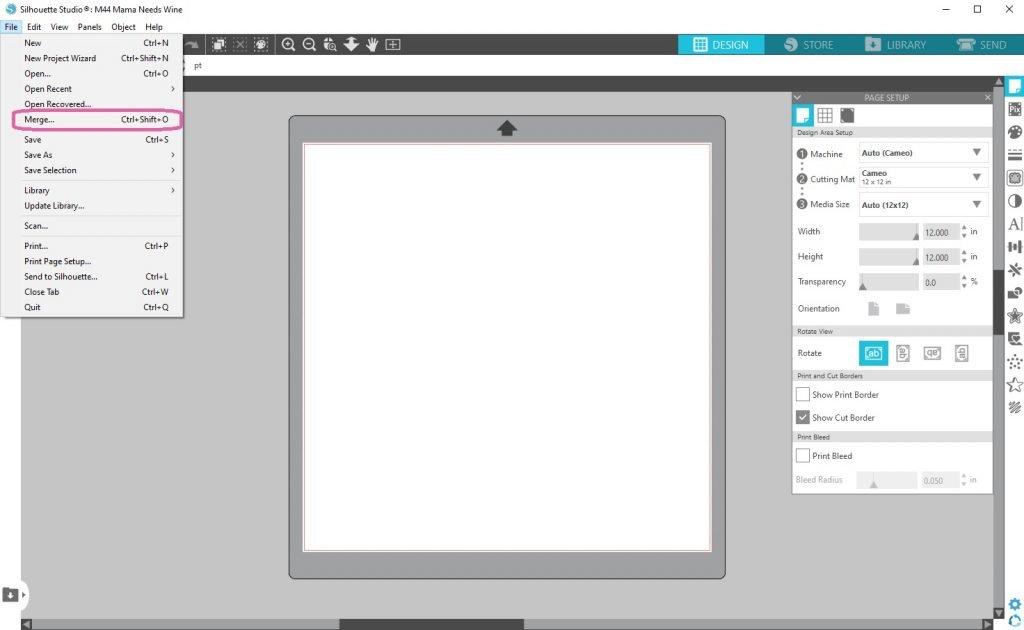
Step 1 – Import the DXF file into Silhouette Studio
Open Silhouette Studio software, a blank canvas with 12-inch * 12-inch dimensions opens up. Click on “File” -> select the “Merge…” option, and this will pop up a file browser window.
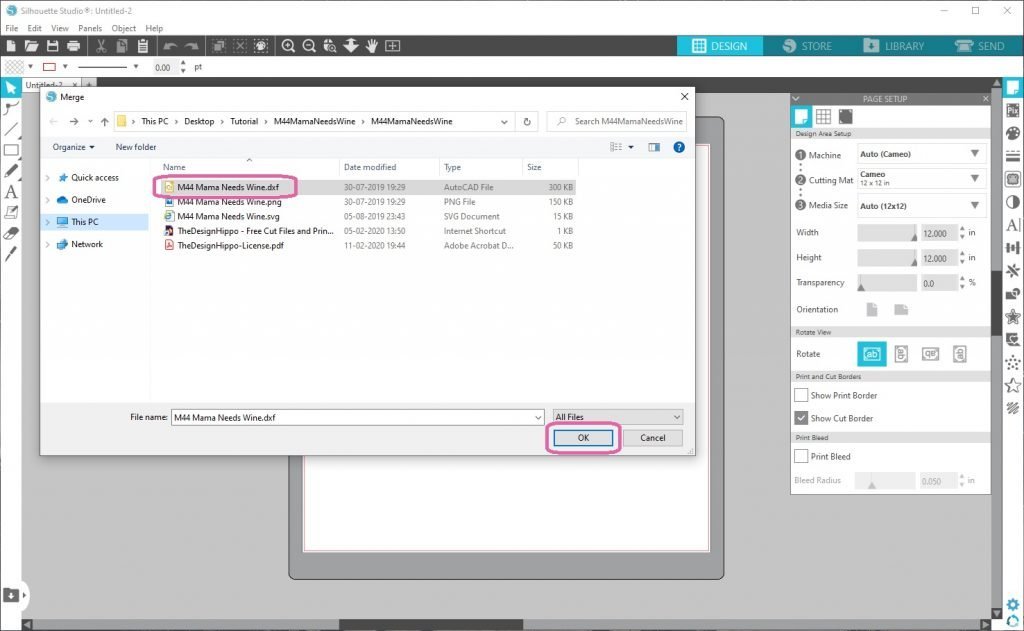
Go to the unzipped design folder, select the DXF file of the design and click on “Ok”. This will import the design as an outline in black color into your blank canvas.
If you like the design I used in this tutorial, you can download it for free from my mama needs wine blog post.
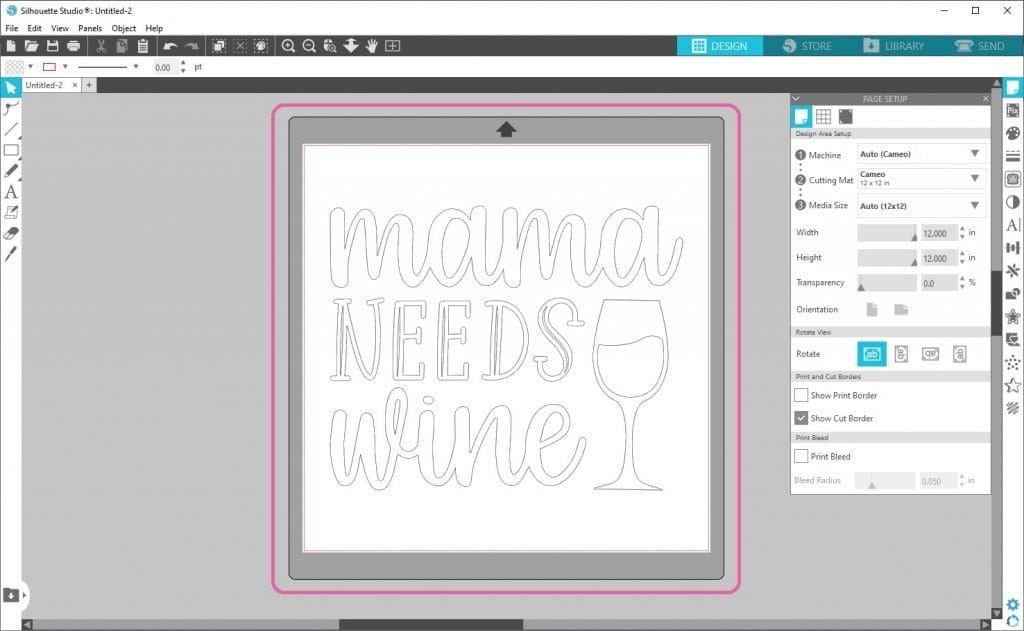
Step 2 – Working with DXF file in Silhouette Studio
We can now see that the design has been imported as an outline. First, we will work on the design to make compound paths and then resize the design before cutting.
Creating a Compound Path
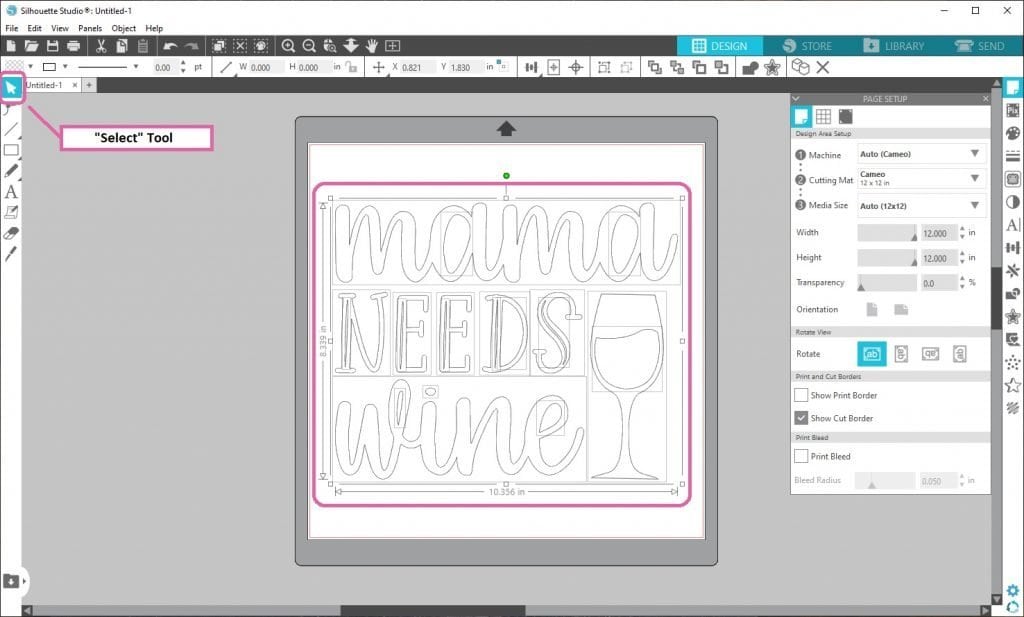
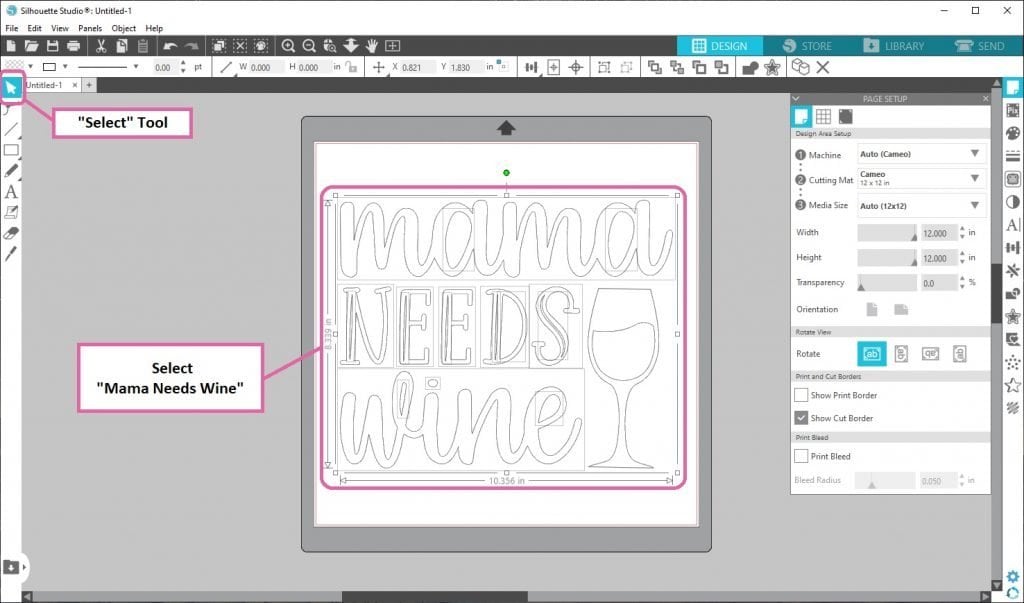
If you are cutting the design in one layer, select all design elements using the “Select” tool (it looks like a mouse cursor located on the top left corner of the Silhouette Studio).
Once the “Select” tool is selected, hold your left mouse button at the corner of the design and select all elements. Alternatively, you can press the “Ctrl/Cmd + A” buttons on your keyboard.
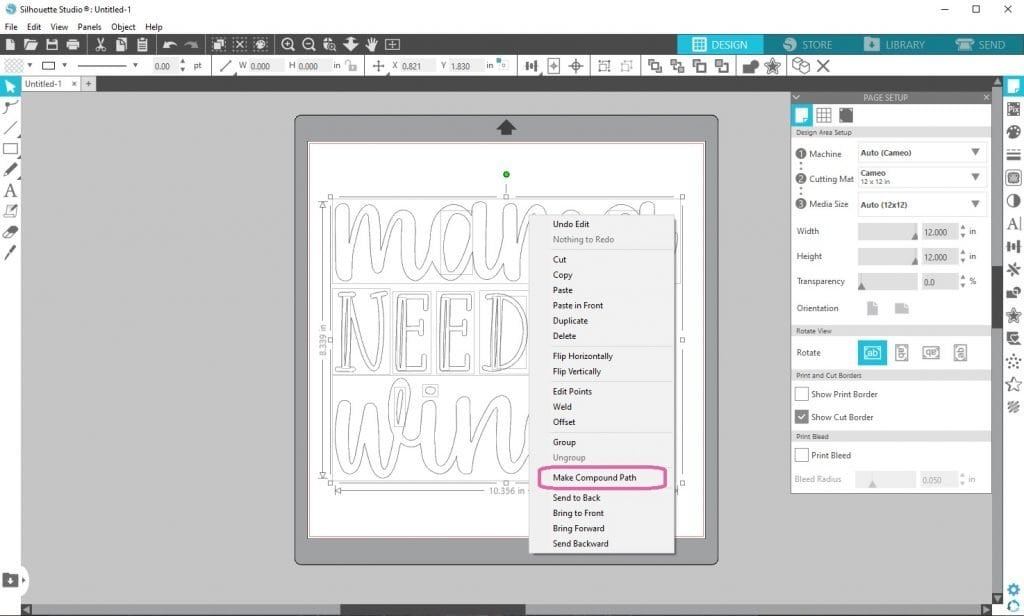
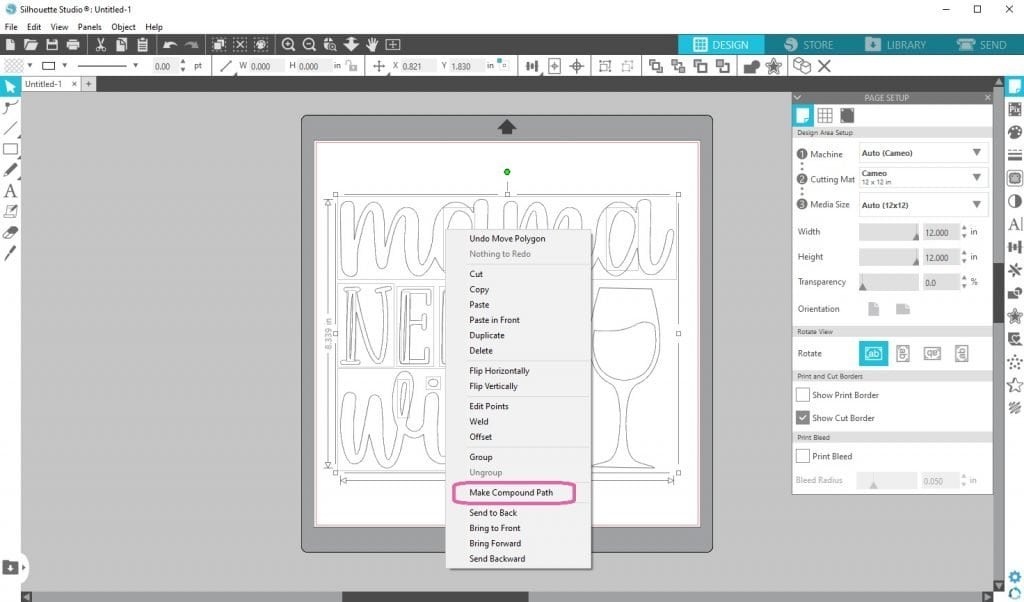
Now right-click with your mouse on the design and select the “Make Compound Path” option. This will weld all elements of the design together and create a compound path.
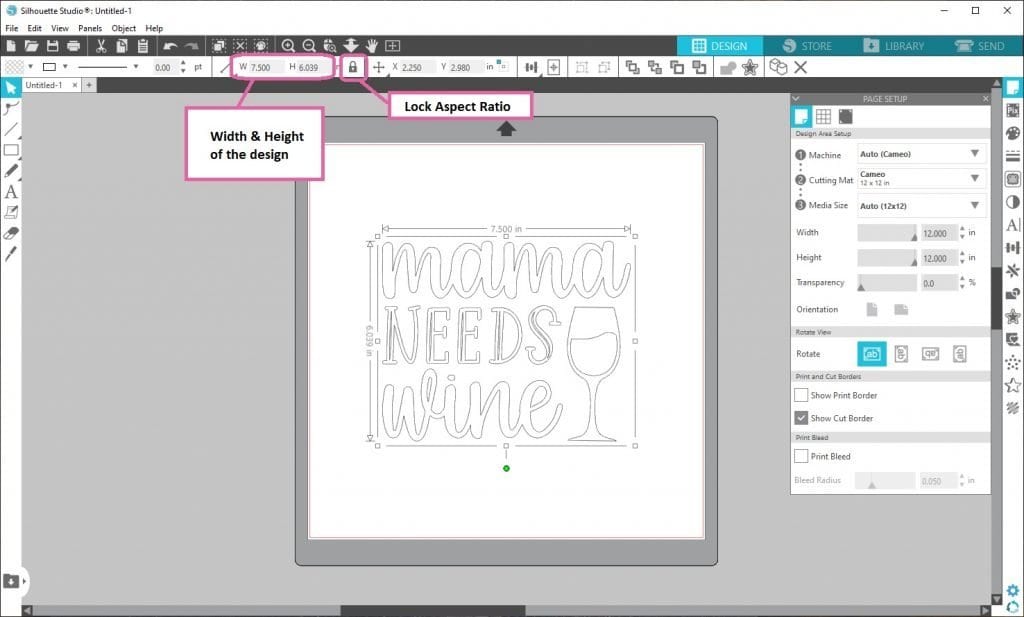
To resize, click on the “Select” tool and click anywhere on the design (or press the “Ctrl/Cmd + A” buttons of your keyboard).
Adjust the size of the design as per your requirement by changing “W” and “H” values. Lock the aspect ratio of the design to maintain the proportion W: H while resizing.
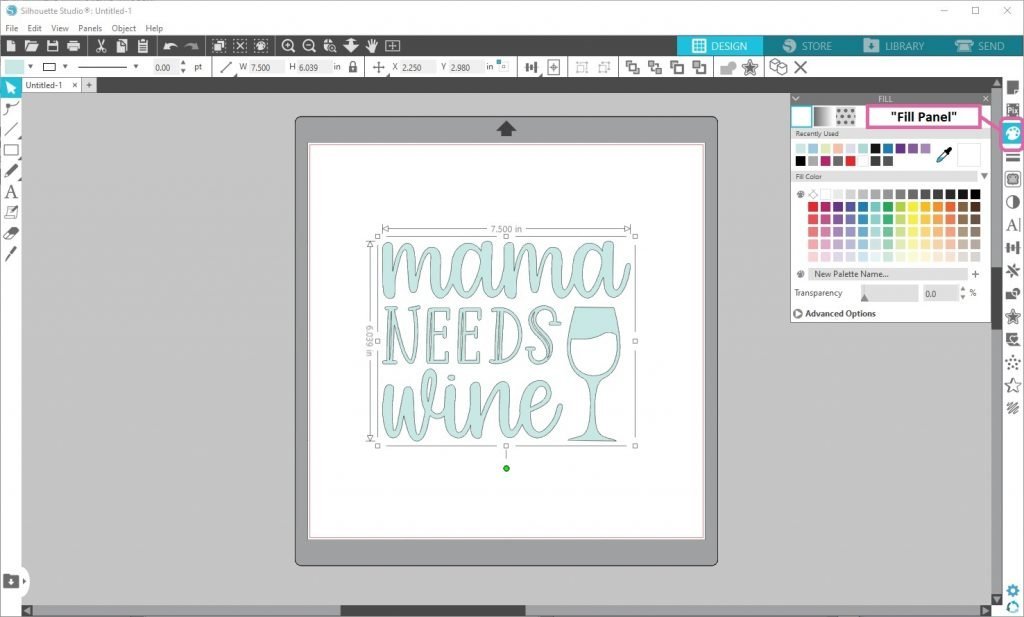
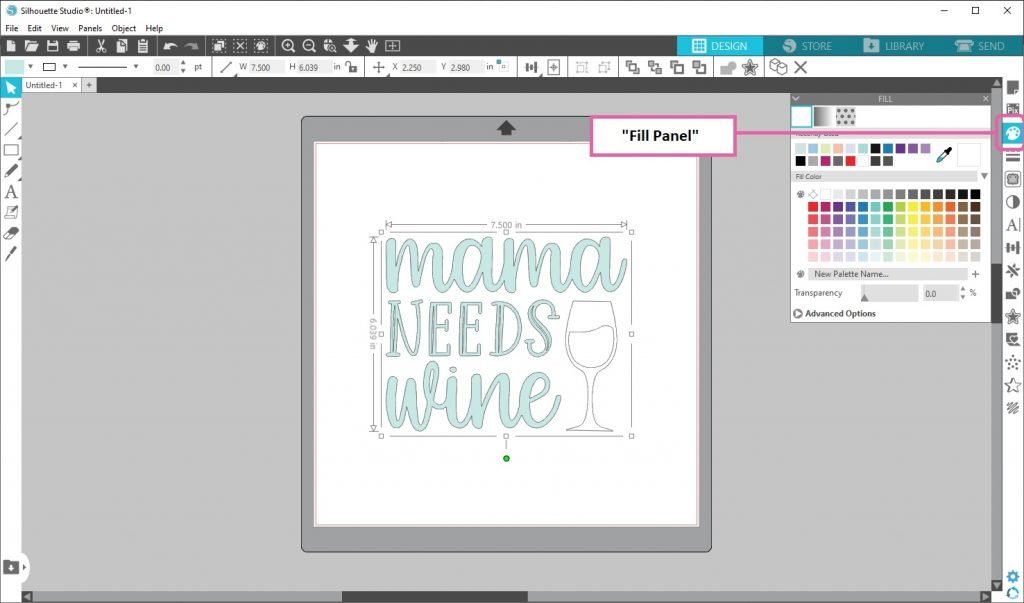
To fill color to the design, click on the “Fill Panel” icon located on the right side of the Silhouette Studio. The “Fill” panel opens; select a color under the “Fill color” section.
Creating Multiple Compound Paths
If you plan to cut the design into multiple layers, we need to create multiple paths from our imported design.
For example, in this tutorial, I am using the Mama Needs Wine design. Let’s say we want the words and the wine glass silhouette separately.
To do that, from the design, we select the words – “Mama Needs Wine” using the “Select” tool and by holding the “Shift” key of your keyboard. Then click on the elements you want to group.
Now right-click with your mouse on the selected design word(s)/element(s) and select the “Make Compound Path” option. This will weld the word(s)/element(s) together into a single path.
Repeat the above steps till you create the required layers. For our example, we do this twice, once for the words and another for the wine glass.
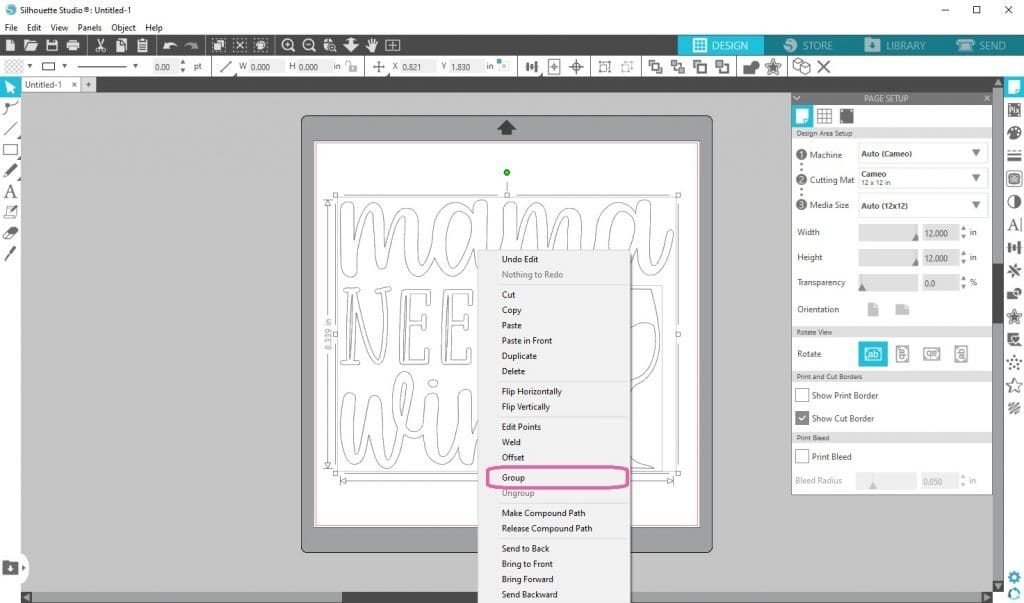
To resize the design: Group all paths by pressing the “Ctrl/Cmd + A” buttons of your keyboard and right-click on the design with your mouse. Select the “Group” option to group the paths.
Click on the “Select” tool and click anywhere on the design or by pressing the “Ctrl/Cmd + A” buttons on your keyboard. Adjust the size of the design as per your requirement by changing “W” and “H” values. Lock the aspect ratio of the design to maintain the proportion W: H while resizing.

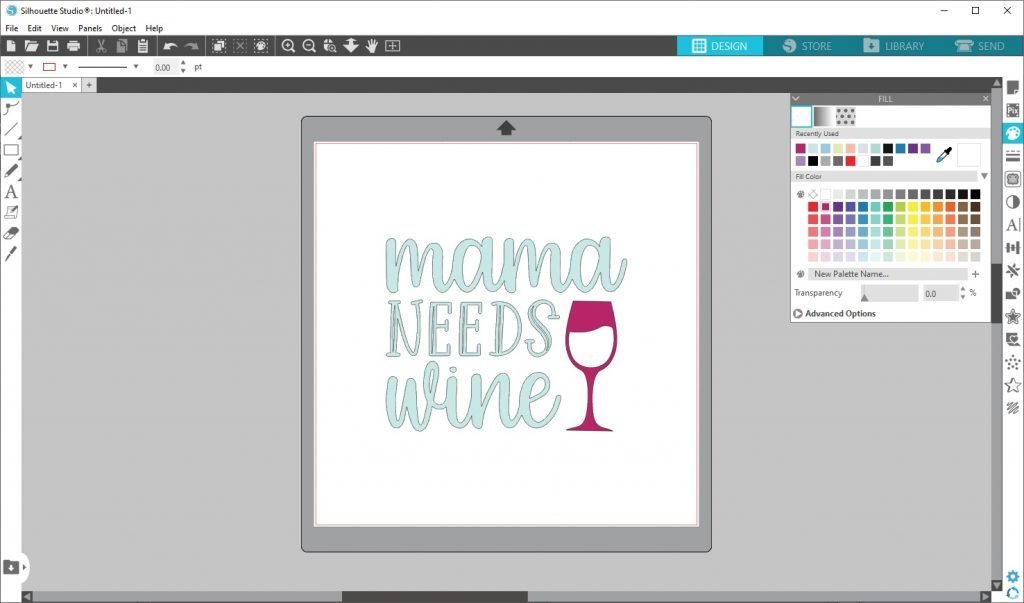
To fill colors to the design, Ungroup the paths by right-clicking on the design with your mouse and select the “Ungroup” option.
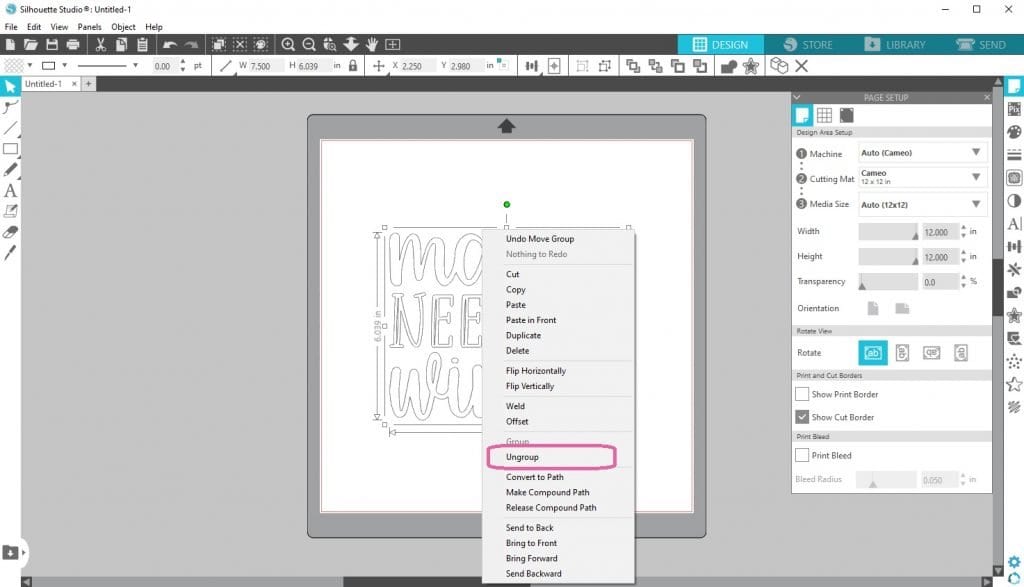
Select a path, click on the “Fill Panel” icon located on the right side of the Silhouette Studio. The “Fill” panel opens; select a color under the “Fill color” section. Repeat the same for other paths (like the wine glass in this example).
To print the design, click on “File“->”Print” or click on the printer icon in the toolbar. To cut the design, click on “Send” (top right corner of the software).
Now you know how to use DXF files in Silhouette Studio. You are amazing! To download more DXF files, head over to the cut files section of the blog.