Whether you want to customize designs or create new shapes in Cricut Design Space, knowing how to use the Slice tool is very important. Using the slice tool you can create exciting new shapes such as frames, monograms, patterns, and more. You can also modify designs to personalize them with names.
In this simple step-by-step tutorial, we will learn how to use the Slice tool in Cricut Design Space. By the end of this tutorial, you'll be able to make a simple circle monogram using the Slice tool.
Make sure to pin this to your Cricut Tutorials board on Pinterest!
What is Slice tool?
The main functionality of the Slice tool is to split/separate two overlapping layers into different shapes. Slice creates new cut layers from the two overlapping layers where they intersect, resulting in three or more new shapes. These new shapes will show up in the layers panel. We can then keep the layers we want and delete the unwanted layers from the Slice result.
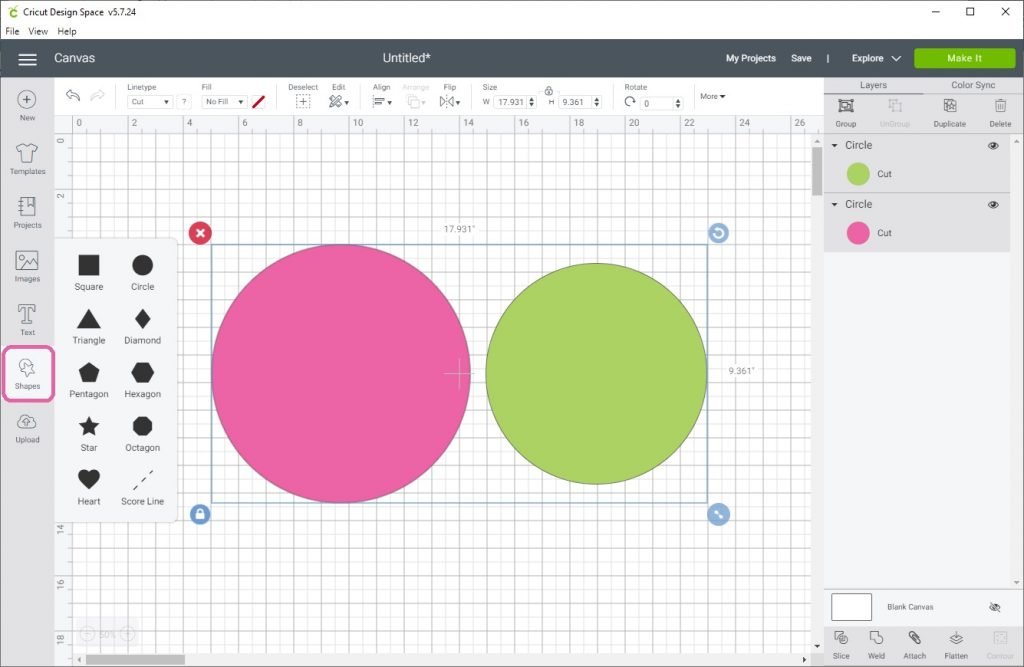
Slice tool appears on the bottom right side of the Design Space, under the layers panel. In the example below we have two overlapping circles.
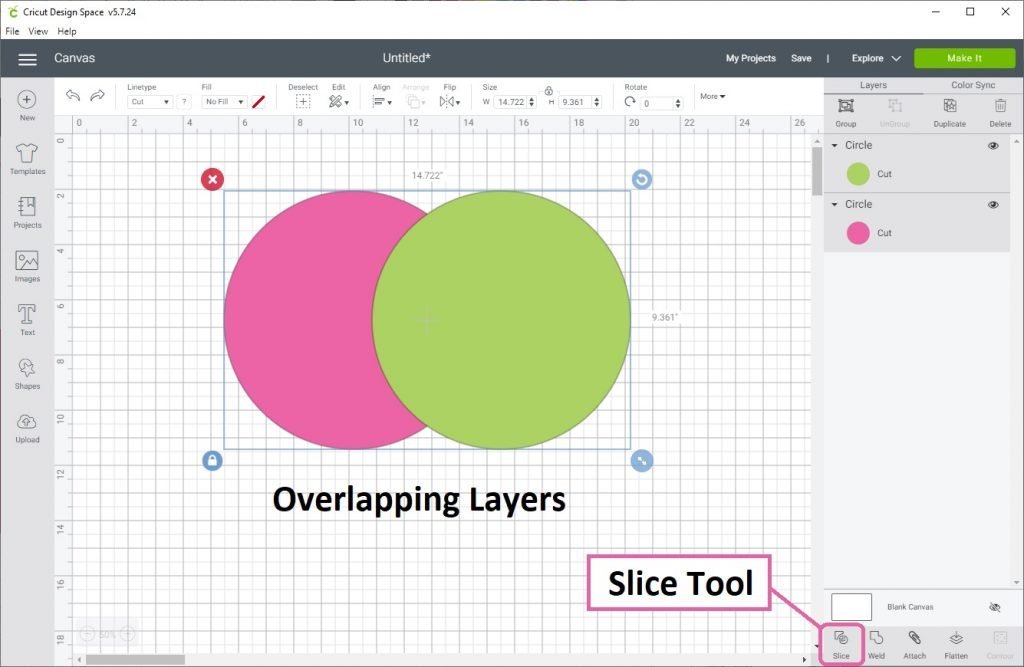
Please note that the slice tool will only work on two layers at a time, so if you have selected more than two layers the Slice tool will be greyed out.
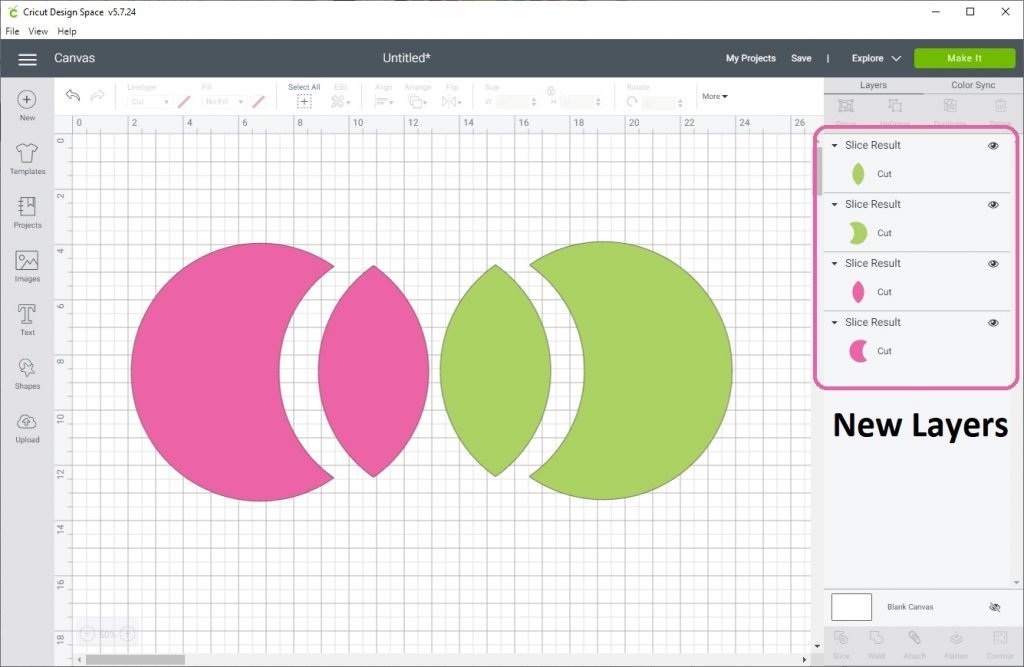
Select the overlapping circles and click on Slice. This results in 4 layers – the overlapping and non overlapping parts of both the circles, which should be visible in the layers panel. I moved the layers apart in the canvas to see the resulting shapes better in the image below.
You can slice any 2 shapes to break them into individual components. You can then work on the individual components to create the design you want.
How to use Slice?
Now you know the basic functionality of the Slice tool. Let's create a simple circle monogram by using this tool.
Step 1 – Initial Preparation
By using the “Shapes” tool insert two circles, a bigger circle and a slightly smaller one. I filled them with different colors for the sake of convenience.
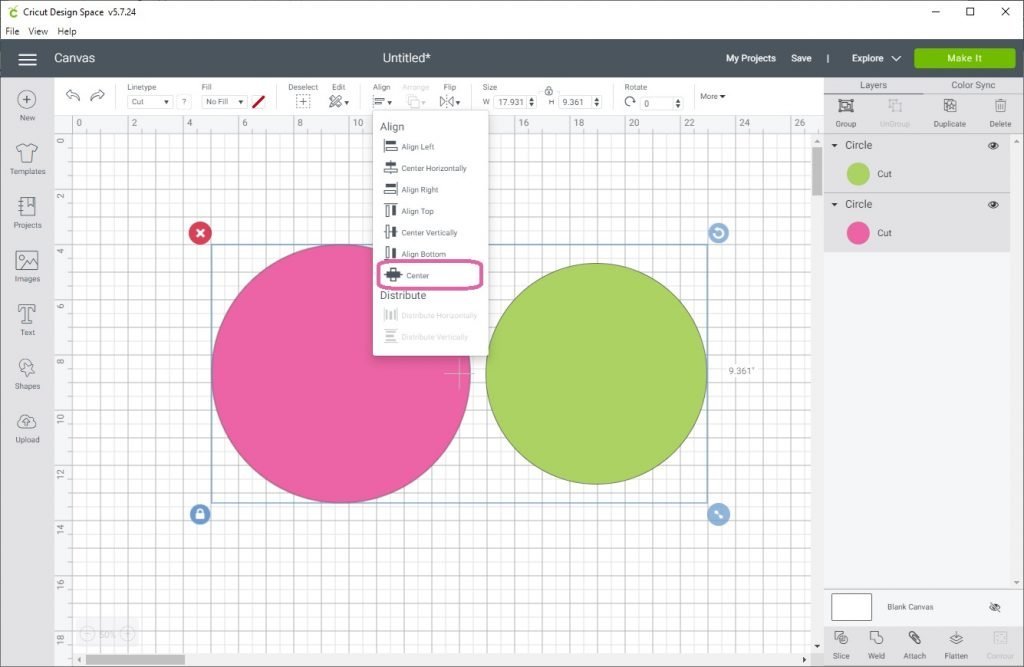
Step 2 – Position and Select
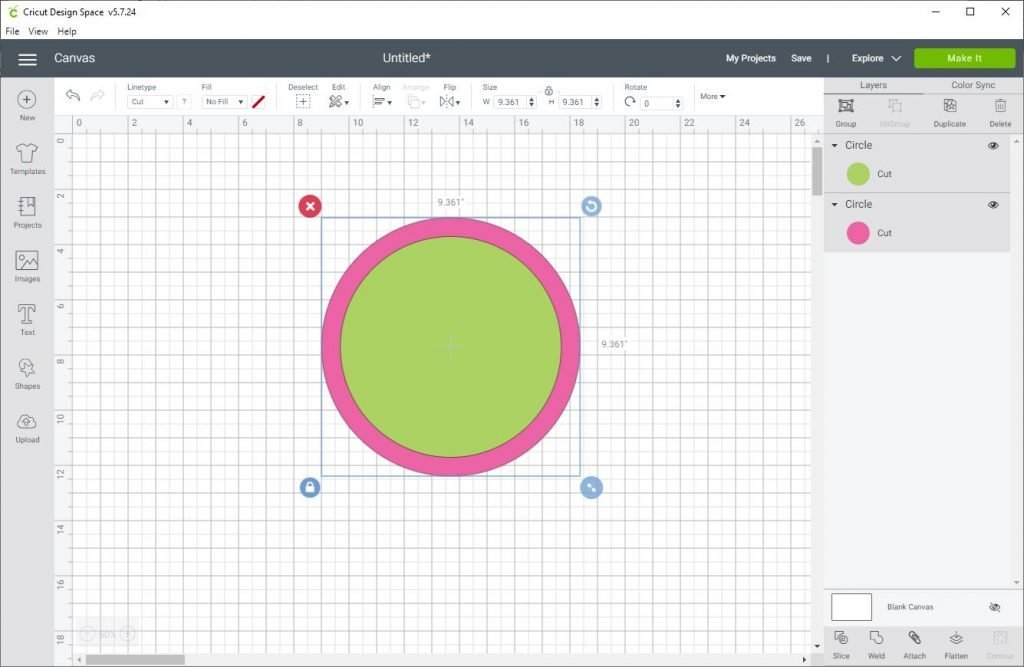
Position the two circles one above the other to form concentric circles. To do this, we can use the “Align” button present in the top bar of the Design Space. Hold the “Shift” or “Ctrl/Cmd” button to select the two circles. Now click on the “Align” button and select the “Center” option to center-align the circles both horizontally and vertically.
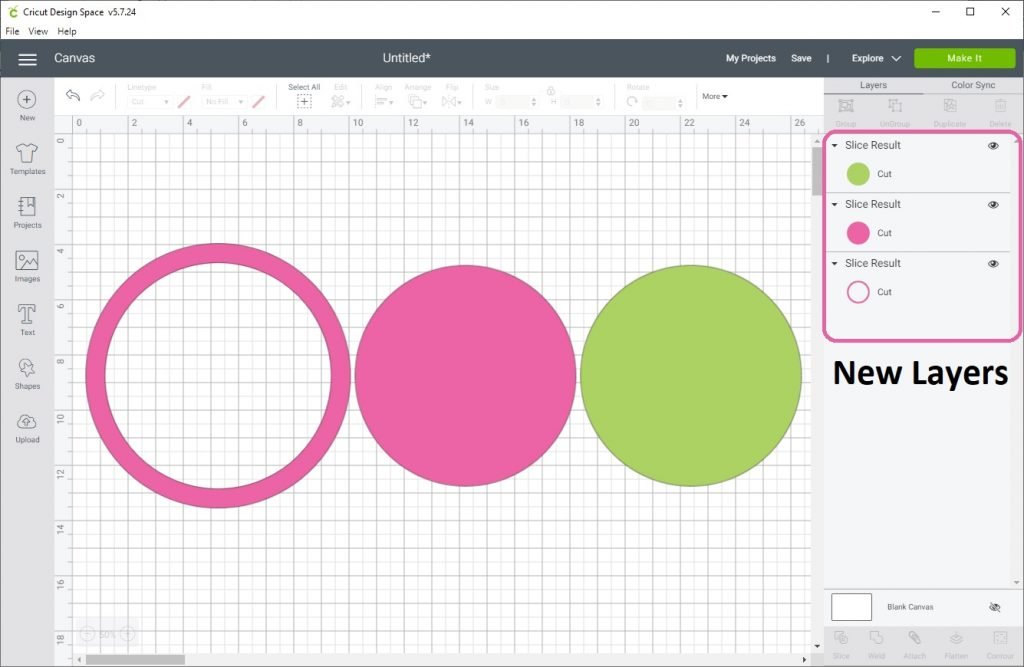
Step 3 – Slice
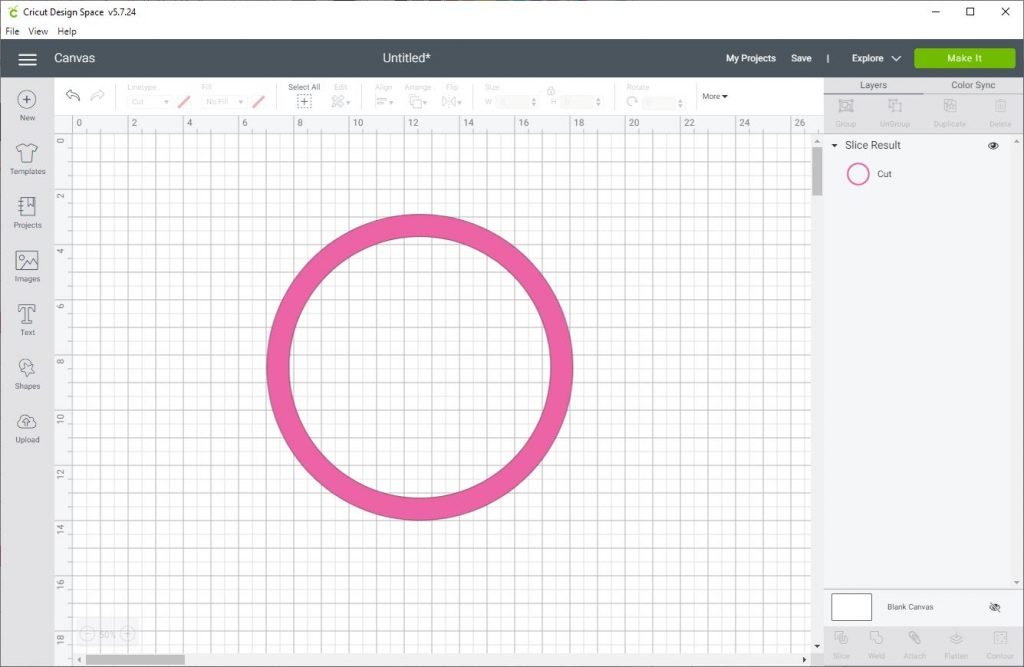
While keeping both the circles selected, click on the “Slice” button. The new layers resulting from the Slice action will appear in the layers panel as shown below. You can now delete the unnecessary layers so that you are left with the circle monogram layer only.
Step 4 – Text Selection
Now that we have our circle monogram, select the “Text” tool and type in the letter of your choice and place it inside the monogram.

I used a cute arrow monogram font in the example above. If you like the font, you can find it here.
Some more ways to use the Slice tool are illustrated below :
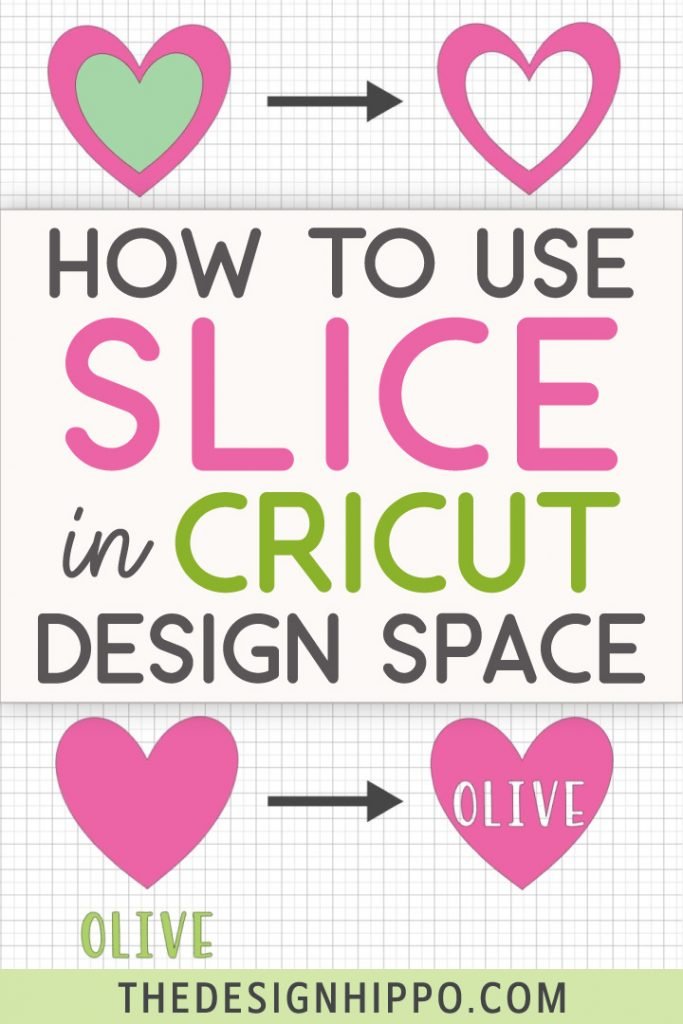
- Cut out text from a shape – Use the Shapes tool in Design Space to create a heart. Then write a name in a font you like. Position the text on top of the heart and align properly. Then select both shapes and click on Slice. Delete the letters from result (in this case green and pink letters) and you will end up with a result as shown below.
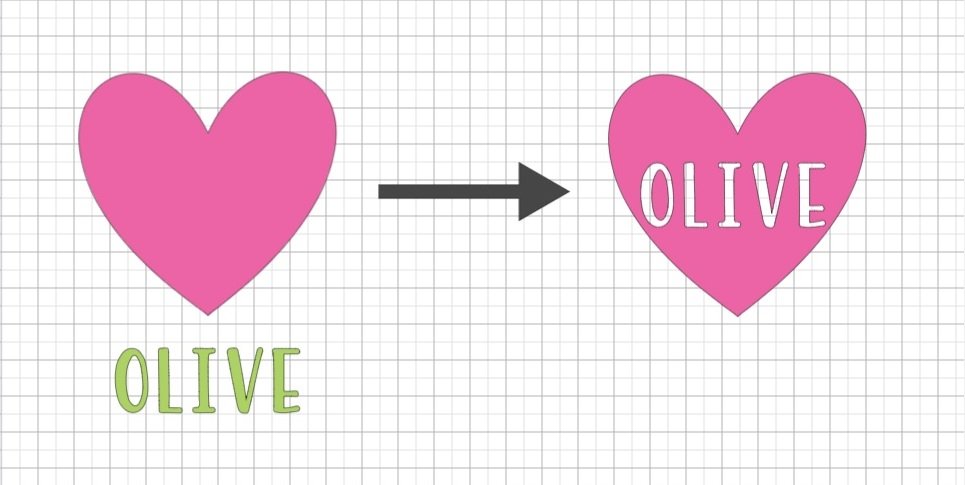
If you like the font I used in the example above, you can find it here.
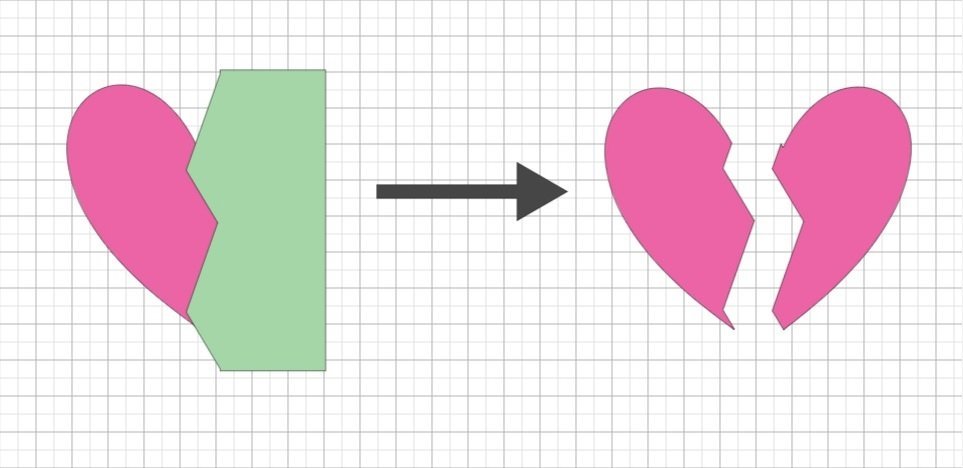
- Breaking a shape – Create a breaking heart design by slicing the heart with a shape like the green one below.
- Cut out one shape from another – Create a frame by slicing two hearts of different sizes.

Hope you find this tutorial helpful. For free SVG files head over to cut files section of the blog.