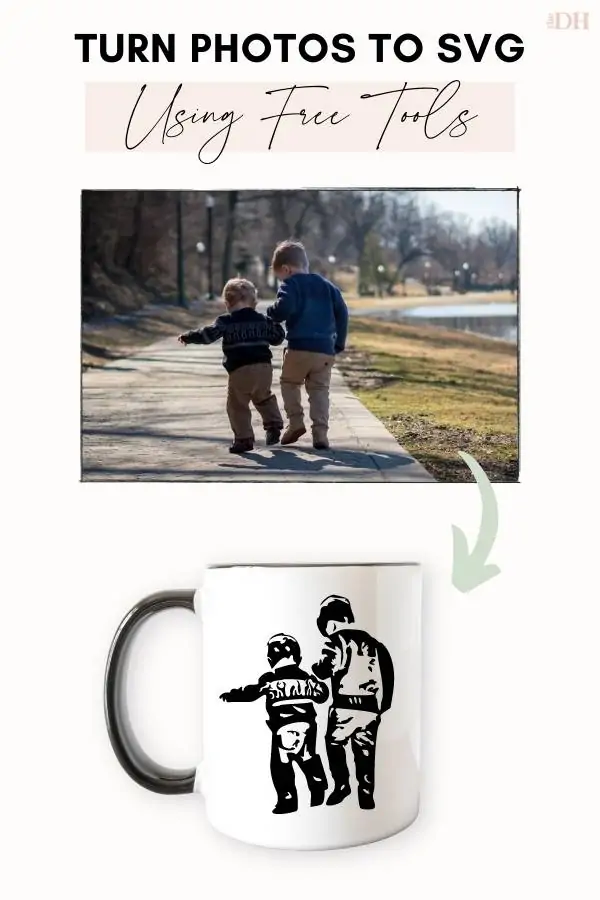
Looking to turn your photos to SVG for Cricut and make unique crafts? Using the right tools, you can easily convert JPG or PNG images to smooth SVG files for Cricut.
And the best part is you can do it using free tools without compromising on the results.
By the end of this step-by-step guide, you'll be ready to convert any picture to a beautiful Cricut SVG.
If you want to convert photos to SVG for Cricut but don't know where to start, you are in the right place.
I tested several tools and software before zeroing in on the best method for converting JPG and PNG files to SVG.
In this step-by-step tutorial, I cover everything from choosing the best photo and removing the background to tips for getting flawless results.
And yes, you can do this all using free tools.
My method works for Windows PC and Mac users. And also for iPhone, iPad, or Android users. You'll find all the links and apps to download in this article.
What you'll need
If you want to make the best SVG files from your images, you'll need two tools:
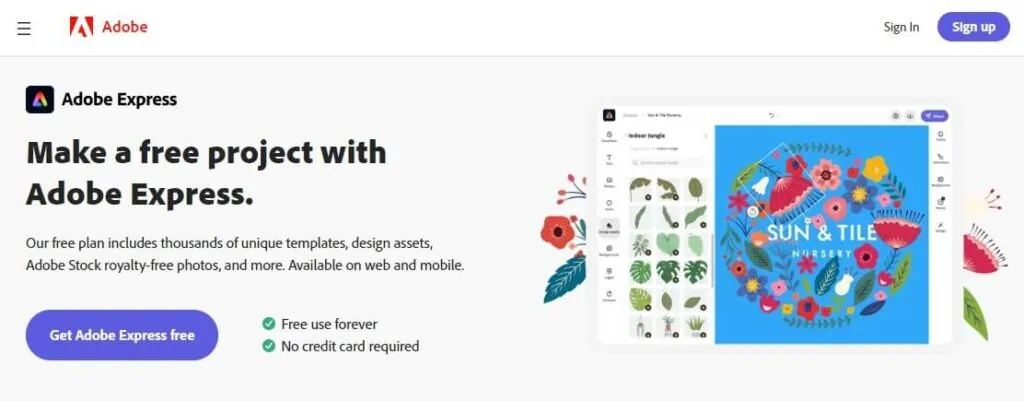
1. Adobe Express
Adobe Express is a free online photo & design tool we'll use to do three important things:
- Remove the background from the picture.
- Enhancing the photo.
- Converting the image to grayscale.
Here are the download links:
- For Windows and Mac – Online app
- For iPhone and iPad – iOS app
- For Android phones – Android app
2. SVG Image Converter
Next, we'll need an image converter to turn the processed image into a cut file for Cricut.
We can do this using a free online tool like PicSVG.
I converted several images using this website and got high-quality SVG files.
Turn your Photo to SVG
Ready to convert your pictures into Cricut designs? Let's get started.
Step 1: Remove the background
With Adobe Express, removing the background from any JPG or PNG file is super easy. Here's how you can do it.
1. Create a new project
Make a free account on Adobe Express.
To create a new project for your image, click on Custom size.
Select document size by entering width and height. Then, click on Next. A blank canvas will appear.

We'll now place our photo in the project:
- Select Photos and click on Upload photo.
- Browse to your file location and import the photo.
- Resize the image to fit the canvas.

2. Delete the background
When you select the image, an Edit image panel will slide in.
Click on Remove background, and a cutout will appear. Proceed to click on the check mark.
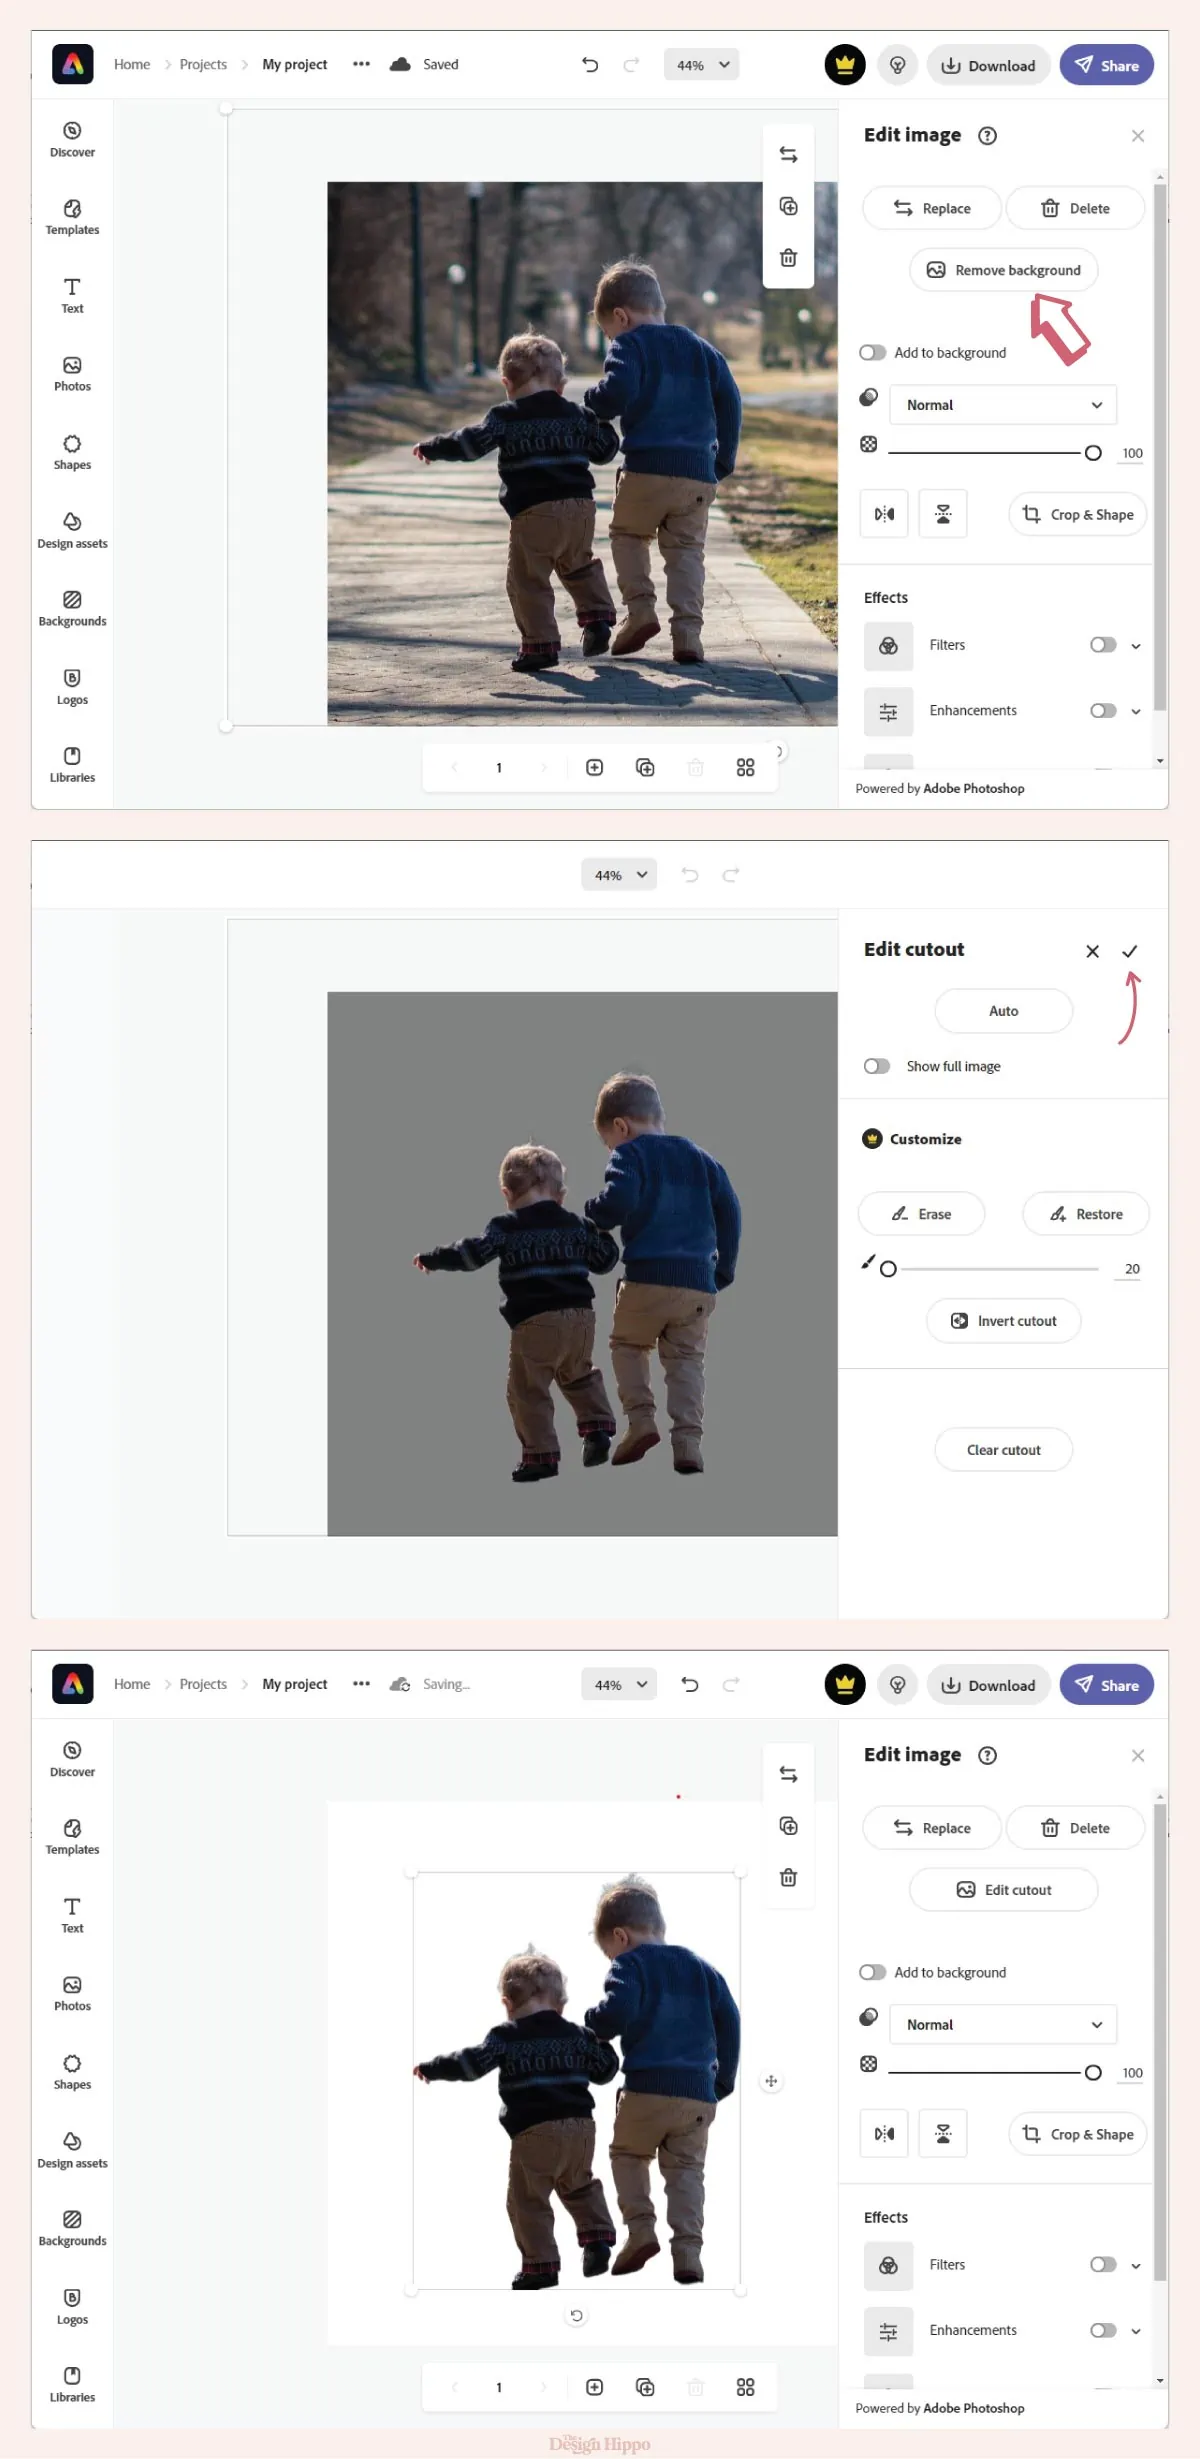
You've successfully removed the background from the image!
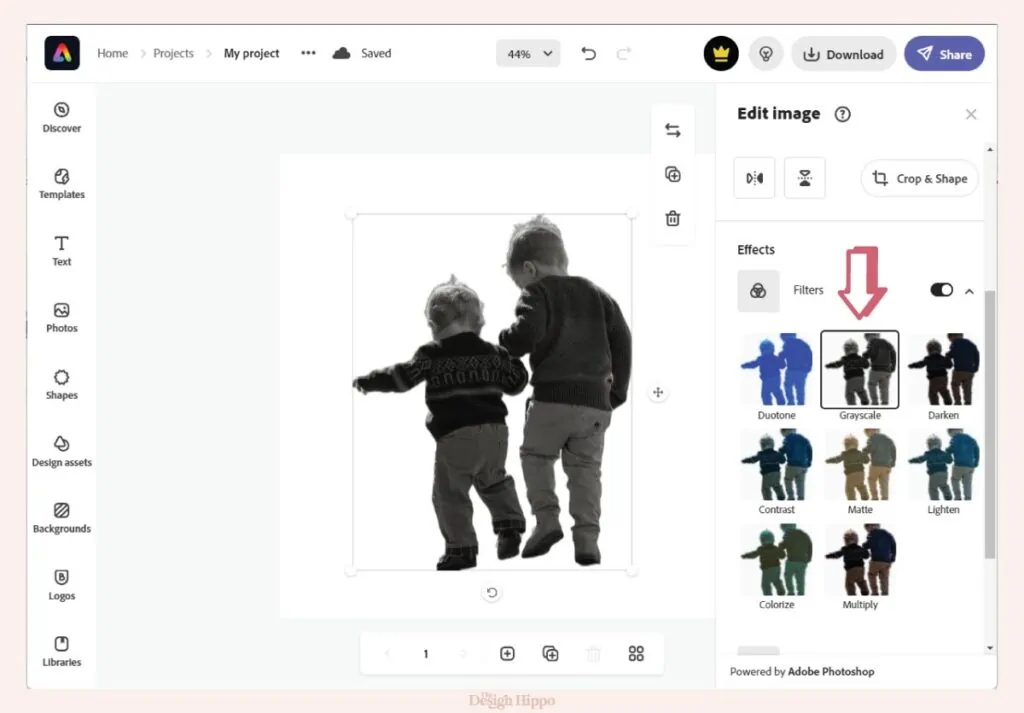
Step 2: Convert the image to grayscale
Technically, you can upload the image from the step above directly to an SVG converter.
But this does not give you the best results.
Converting the picture to grayscale has two advantages. One, it simplifies the image. Thereby making it easier to turn into an SVG. And second, the details will be traced better.
To convert your image to grayscale, go to Effects. In Filters, select Grayscale.
Step 3: Enhance the photo
Another important step that'll give you high-quality SVG files is enhancing the photos.
Edit the photo to highlight the details in it.
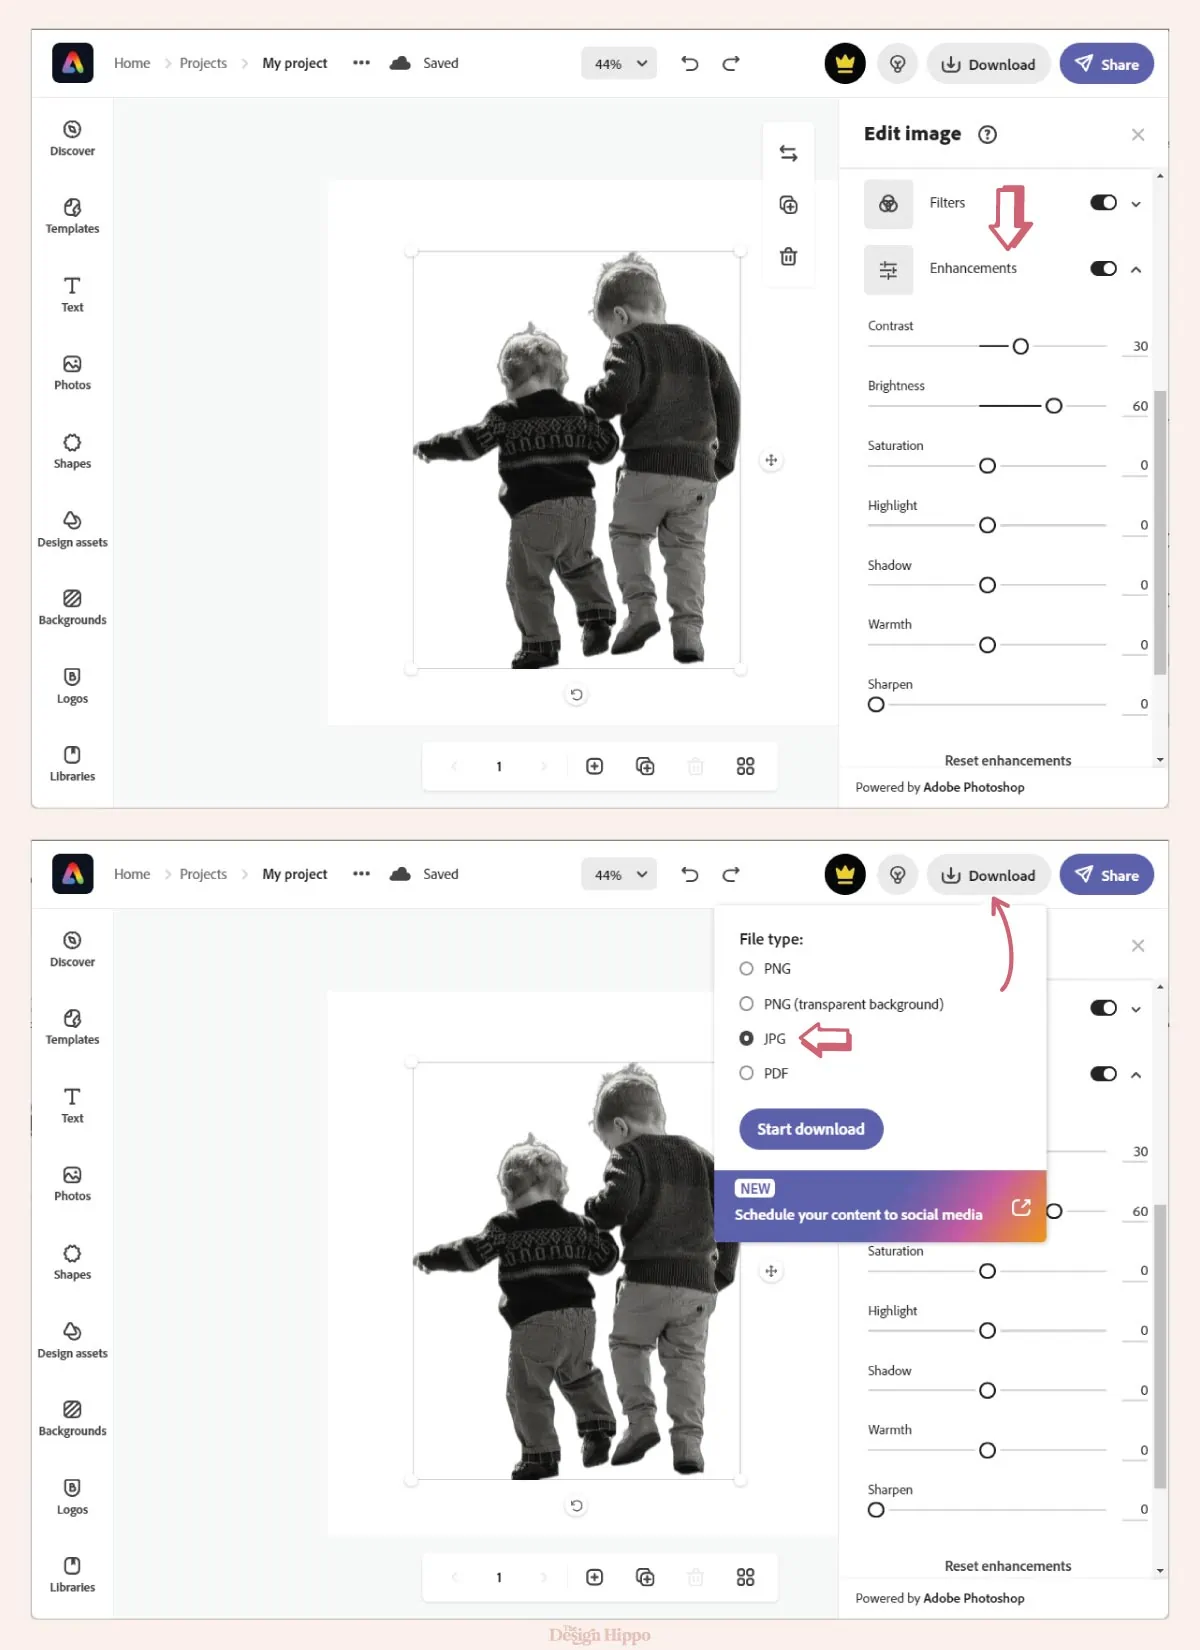
You can do this by going to Enhancements and adjusting the Contrast and Brightness settings.
Since every picture is different, play with these settings to see what works best.
Once you are happy with the image, click on Download and select File type: JPG.
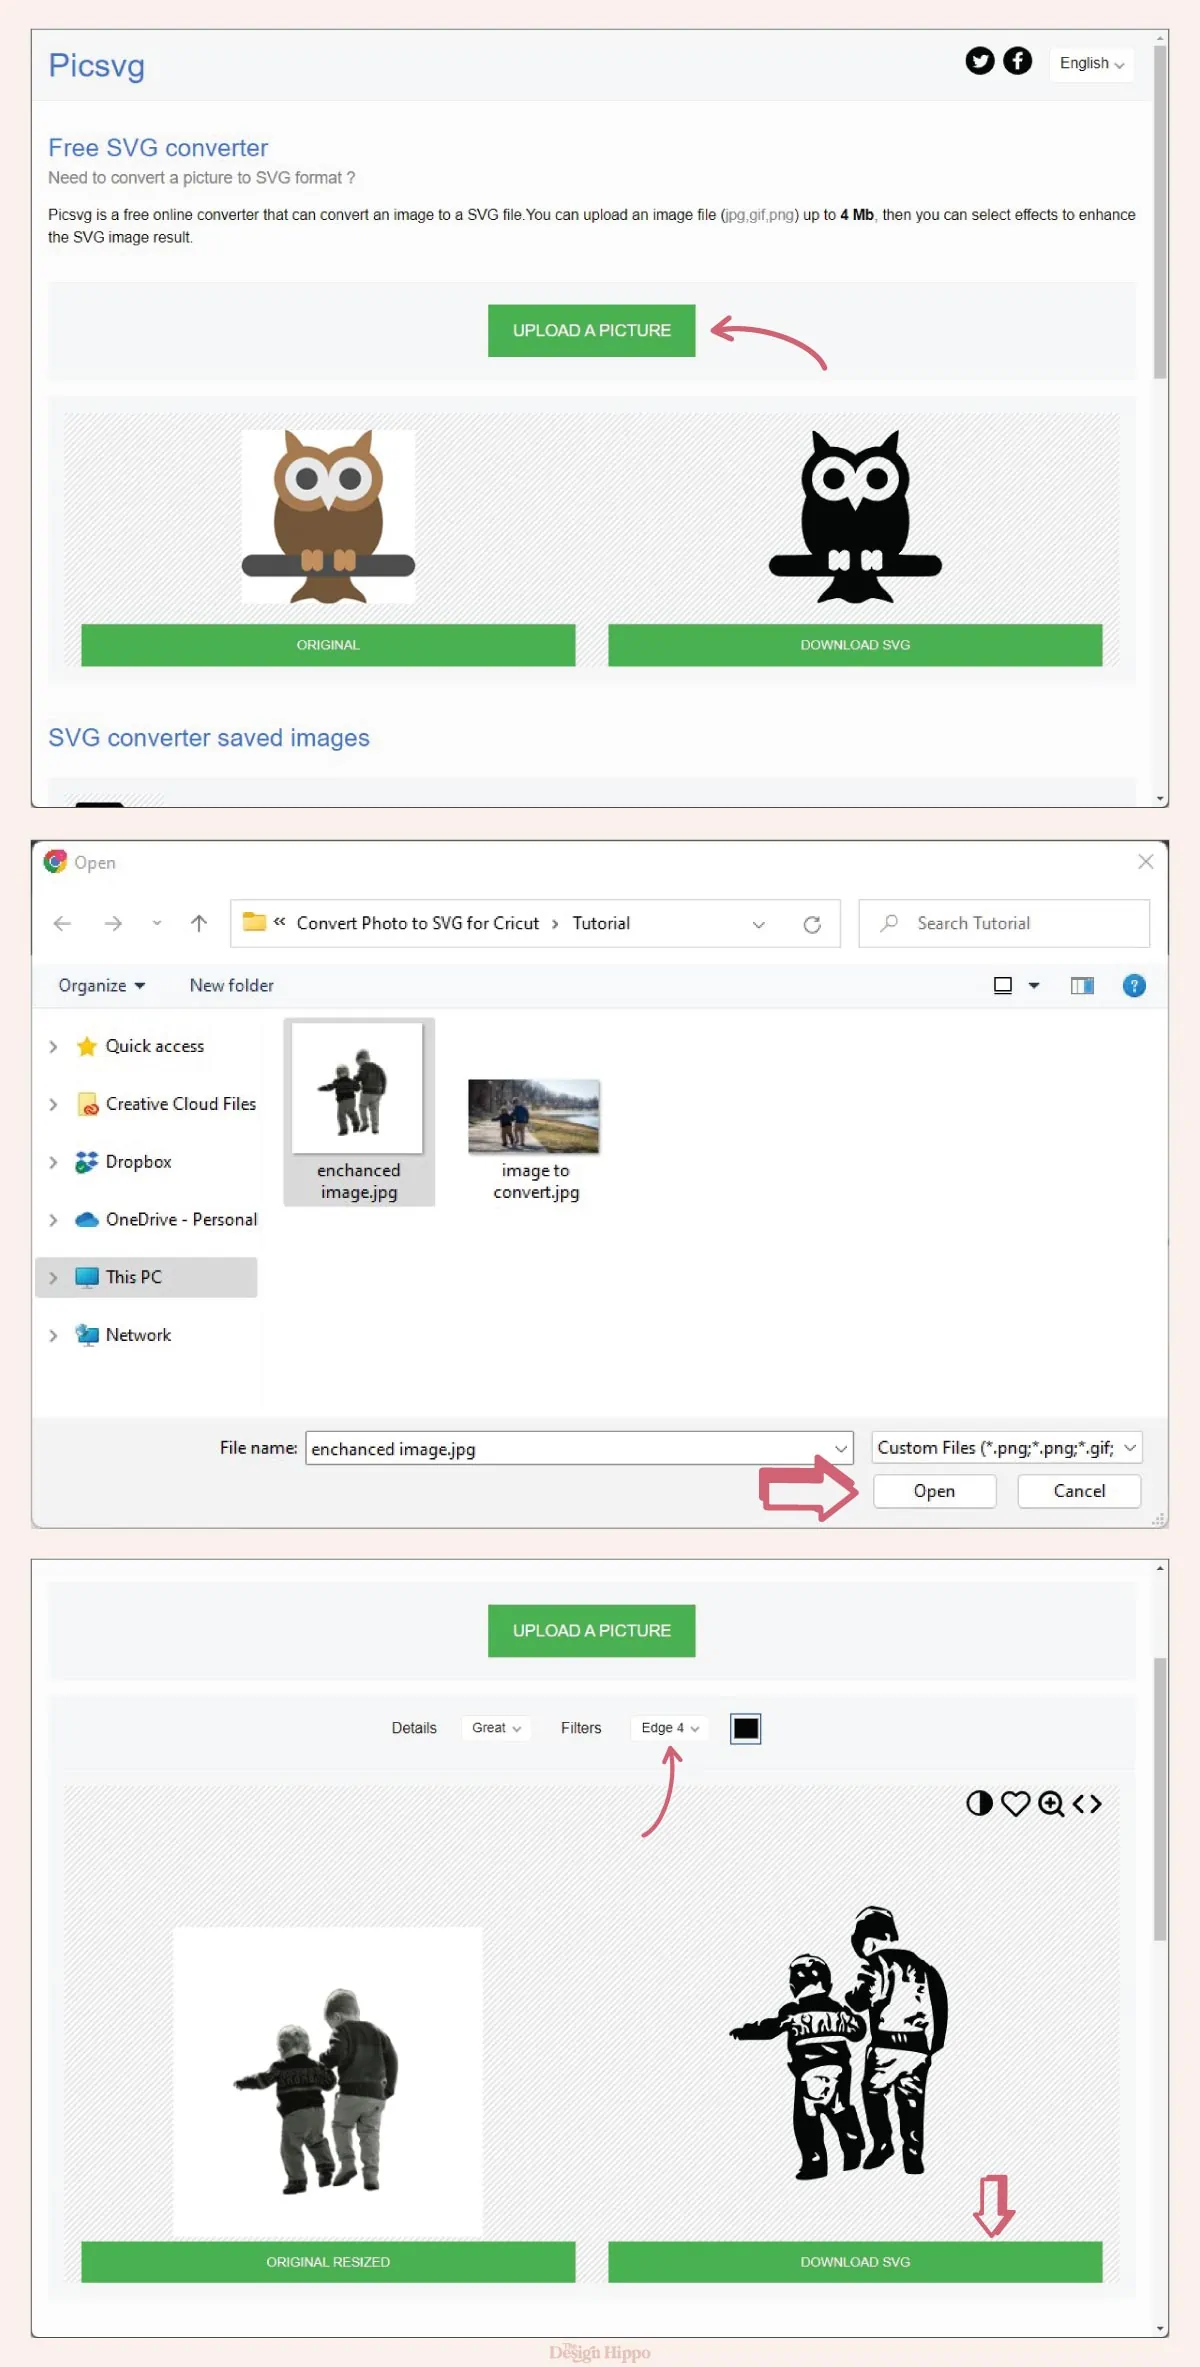
Step 4: Use SVG converter
We're now at the most exciting step! To convert the JPG file to an SVG:
- Goto PicSVG, a free online SVG image converter.
- Click on Upload a picture and select the JPG file.
- Select a Filter. For my image, the Edge 4 option worked best.
- Click on Download SVG.
Upload SVG to Cricut Design Space
Next, import the SVG to Cricut Design Space.
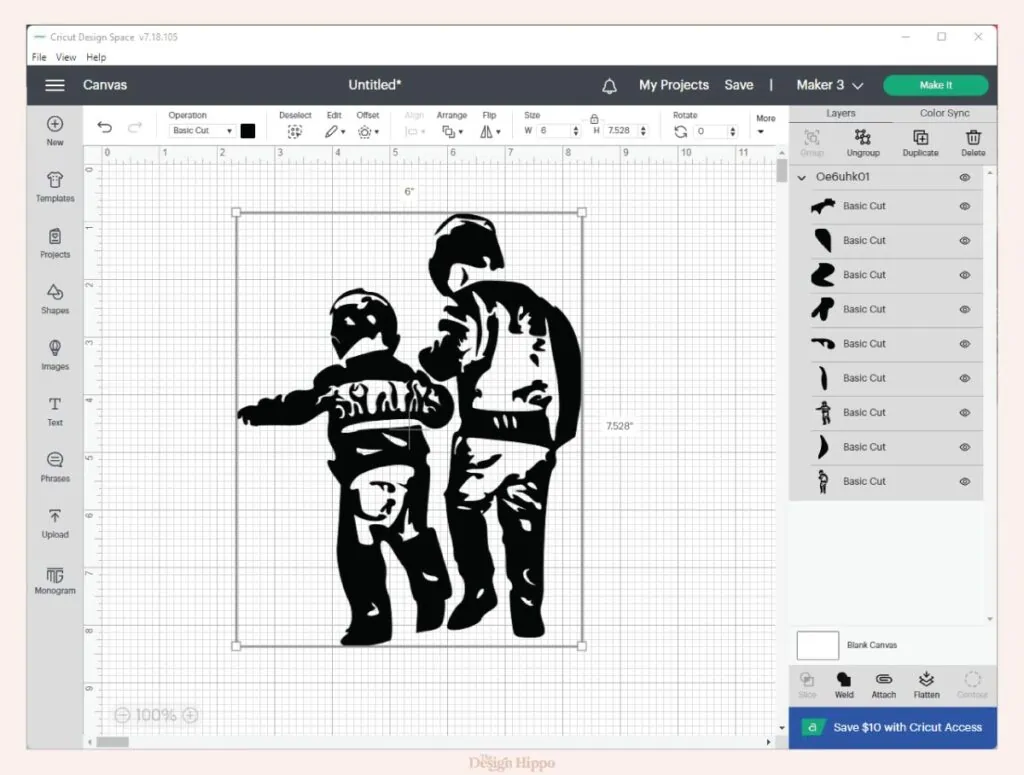
Before we cut the image, here are two things to check:
- Are there any stray points? Delete unnecessary points and shapes using contour to ensure easy cutting.
- Is the design layered correctly? You can weld the SVG into a single layer. To make multiple layers, refer to the FAQs section.
My Tips for Getting Best Results
After converting several pictures, I realized that certain photos give better results. Here are my top tips:
- Use high-resolution images. Blurry and low-resolution photos are harder to convert. If you can choose between multiple images, use a high-resolution one where the main subject is in focus.
- Choose pictures with simple backgrounds. The busier the background, the harder it will be for the software to draw a clear outline around the main subject.
- Go for bright and colorful images. High-contrast images convert best.
- Make enhancements to your photo. To get the best out of a picture, enhance it in Adobe Express. Adjust the contrast, saturation, and brightness settings to highlight the details in an image.
Cricut Project Ideas for Images
Once you learn to convert your first image to SVG, the world is your oyster!
Make decals from your favorite pictures and create everything from DIY tumblers and wood signs to shirts.
You can also personalize the image with names using Cricut fonts. A cute script font or font with tails will work great.

More creative ways to use SVGs made from pictures include:
- Crafts featuring family photos.
- Christmas ornaments with pictures of special moments.
- Wedding gifts and decor. You can customize the craft by adding the wedding date.
- Pet portraits for dog and cat moms.
- Gifts for mom, dad, sister, brother, or grandma for important occasions.
FAQs
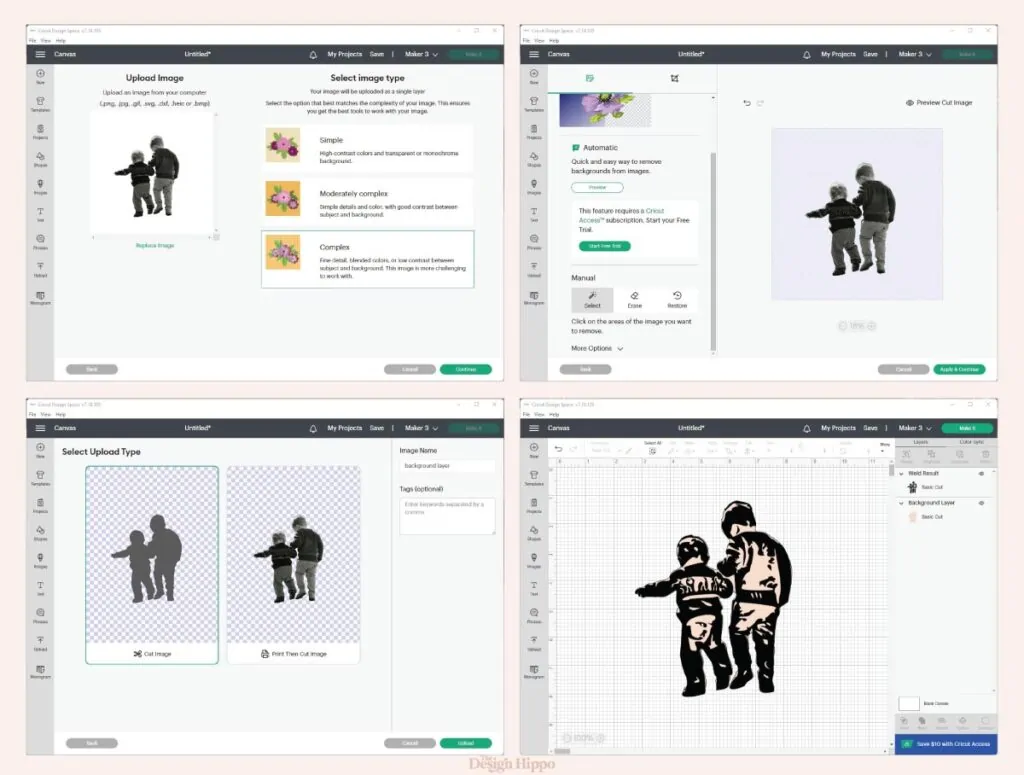
Can I turn a picture into a layered SVG?
Yes. If you want two layers, the easiest way is to add a cut-out that will act as a base layer. You can do this in Cricut Design Space:
- Upload your JPG and Select image type Complex.
- Next, we'll remove the white background. Go to Manual -> Select and click on the background to remove it. Then, click on Apply & Continue.
- Select the Cut image option and click on Upload.
- A silhouette of your image will be saved in your Recent Uploads.
- Superimpose the silhouette with the result from the SVG converter. You now have a layered cut file.
To make even more layers, you'll have to use other tools:
- PNGtoSVG. This free image-to-vector tool gives you the option to generate multiple layers. But the result needs more tweaking.
- Adobe Illustrator. Using the Image Trace function, you can turn pictures into layered SVGs.
What other software can I use?
If you already have access to graphic design software like Adobe Illustrator or Adobe Photoshop, you can use their inbuilt tracing features to make SVG files.
I also tried Inkscape, but using the method in this tutorial gave the best results.